Using Builder
All the base knowledge we assume at the start of this workshop can be learned from this 15 minute video
In this demo we will work through making a Numerical Stroop task in PsychoPy.
What makes a PsychoPy experiment?
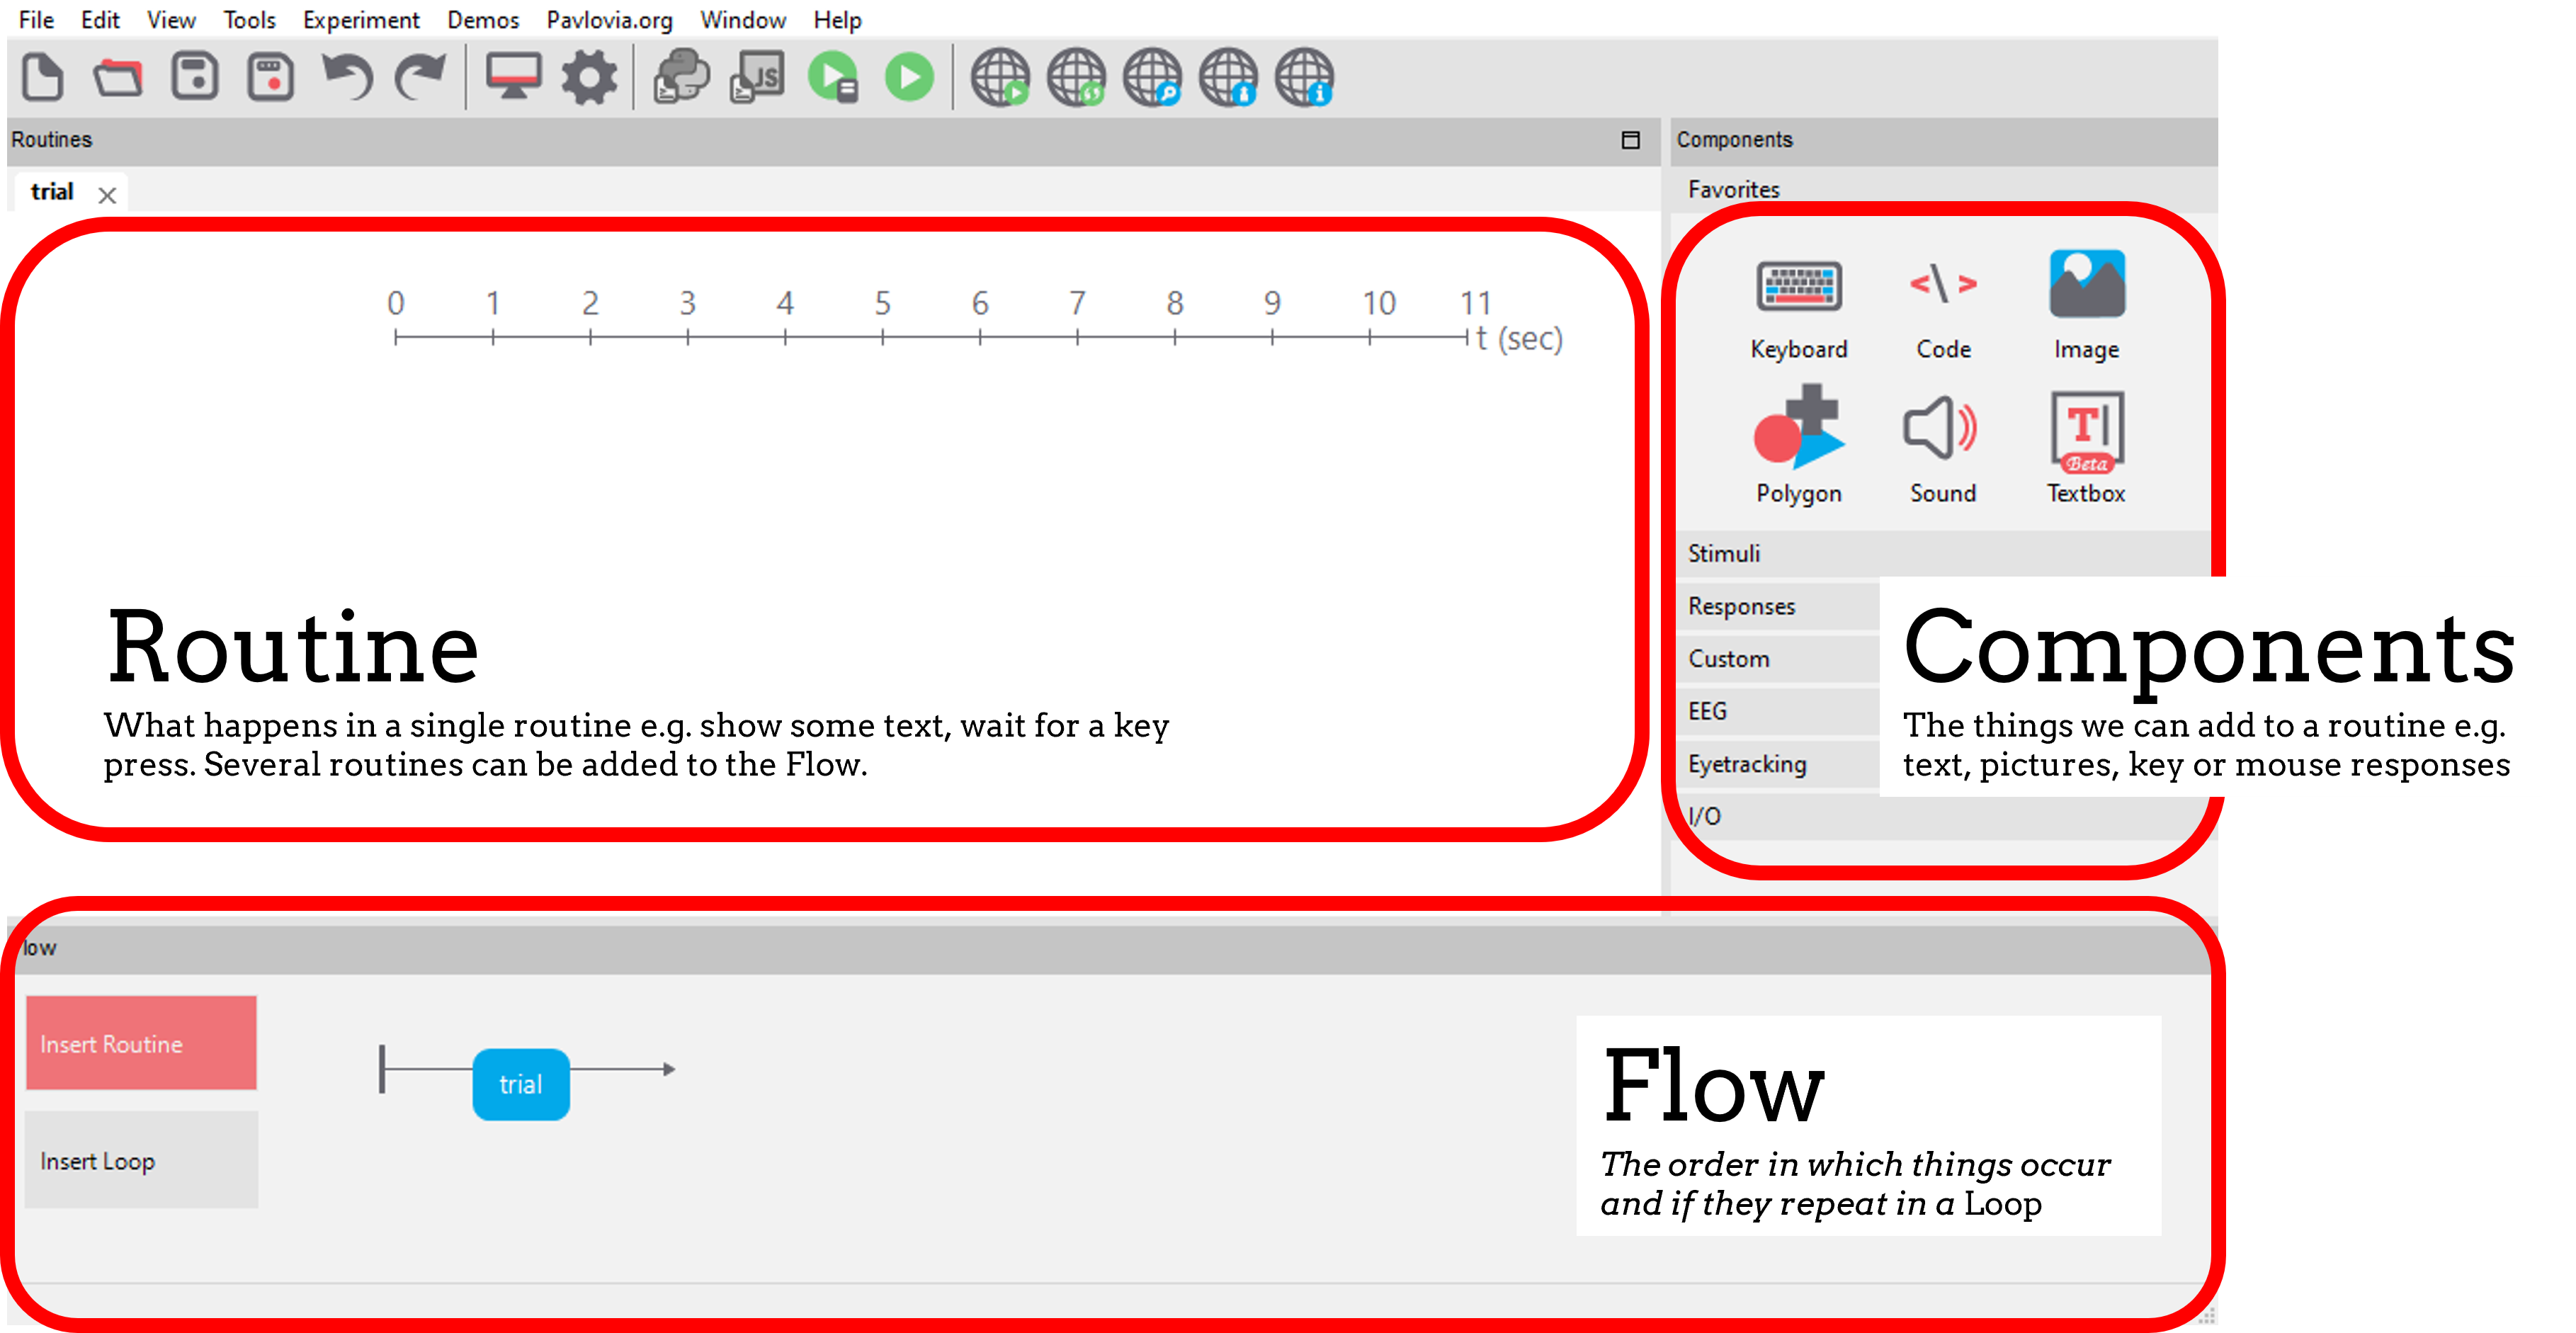
A builder experiment has three main sections. To start making an experiment we add routines to our flow and add components to our routines.
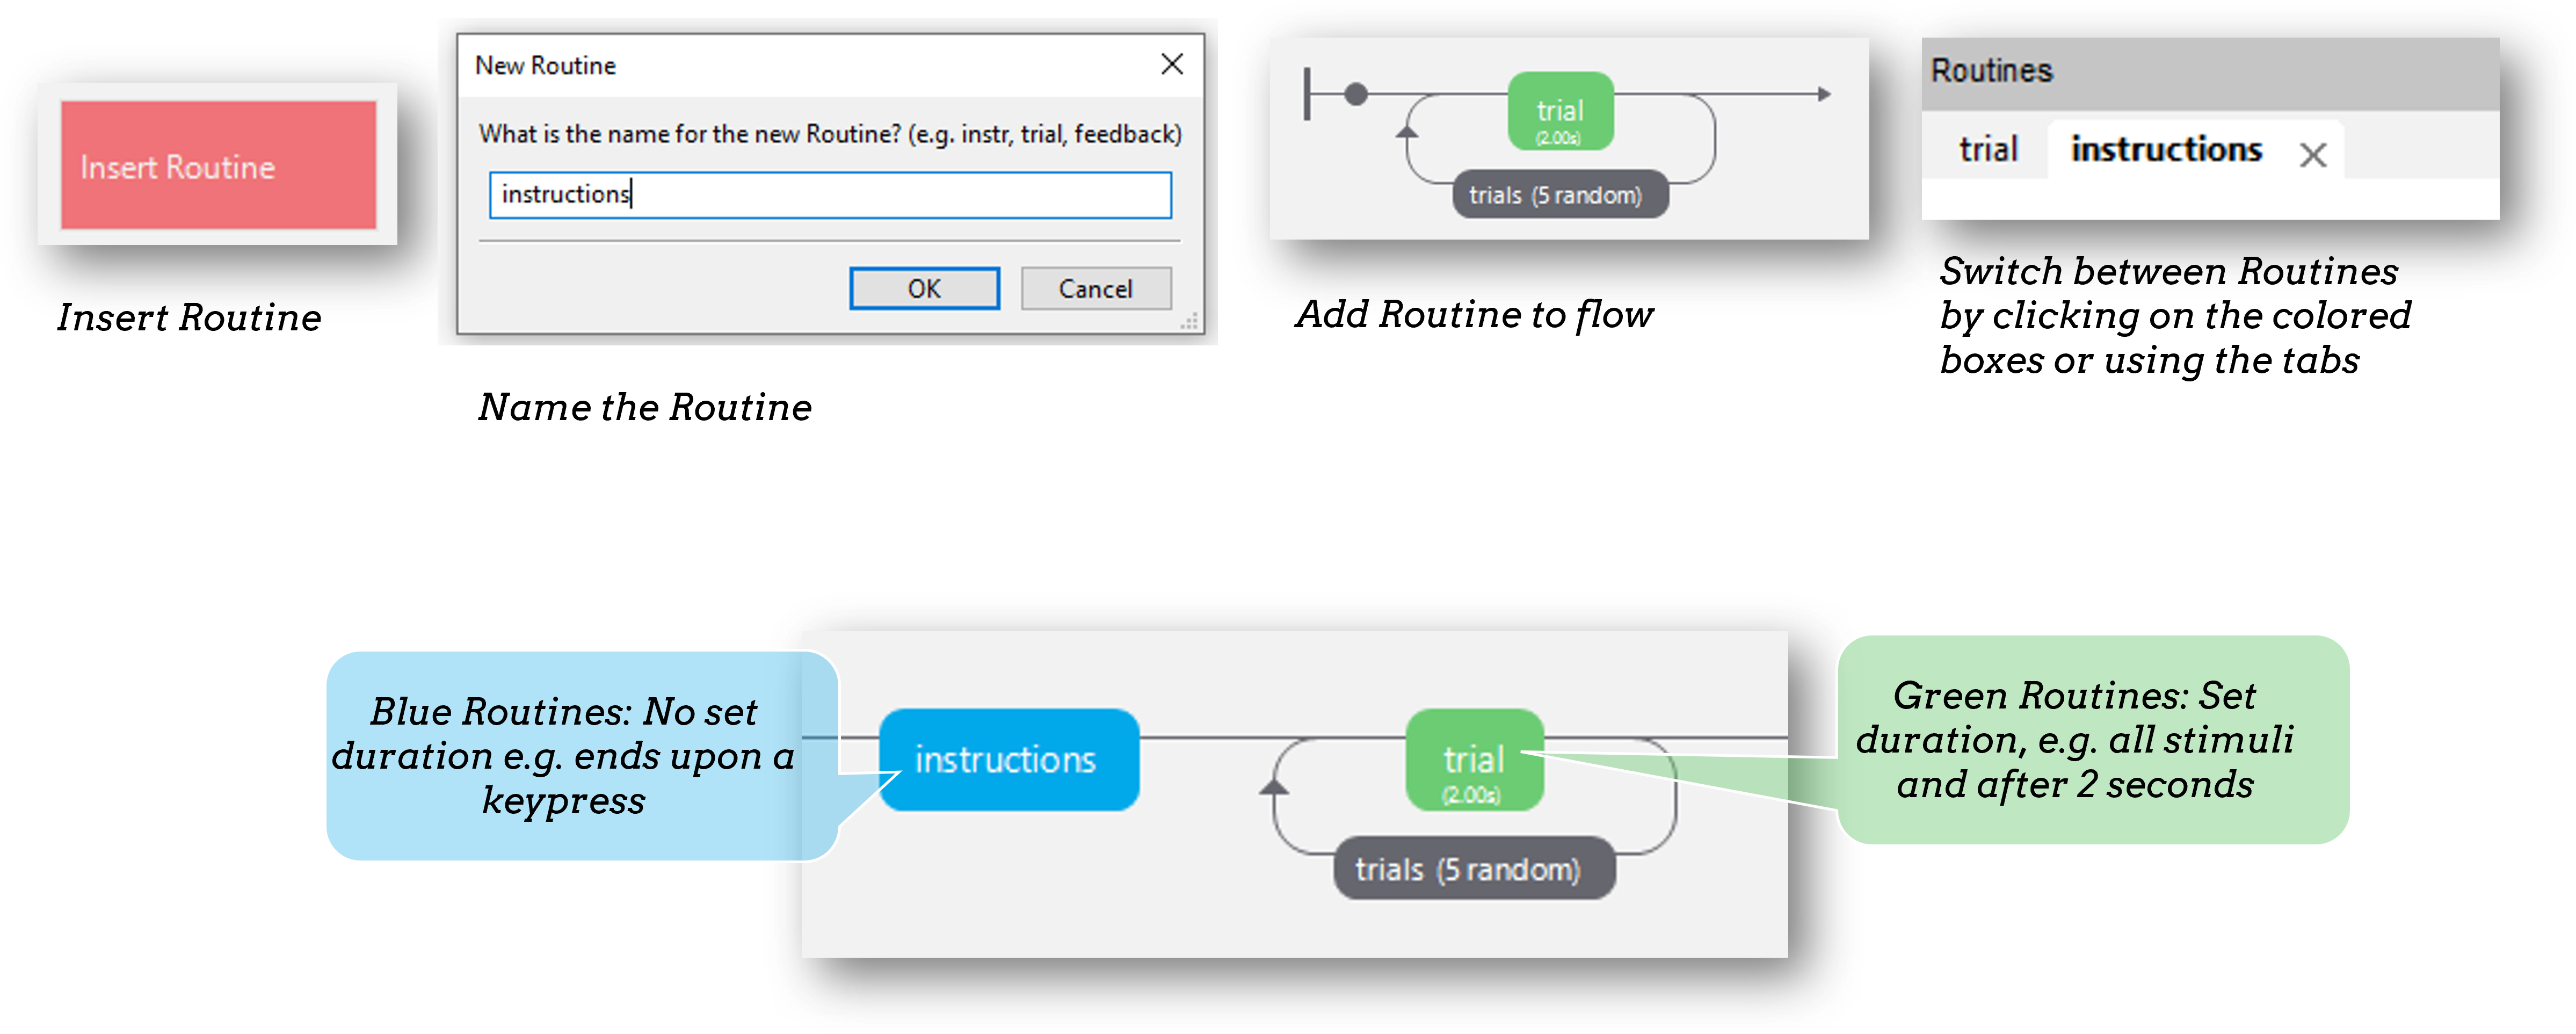
Creating a routine
A Routine is the basic building block of PsychoPy experiments. They could be complex (e.g. a single trial) or simple (e.g. an Inter-Trial-Interval presenting a fixation cross).
Changing things trial-by-trial (the “conditions” file)
To present several trials, add a loop around the routine to repeat. If something changes trial-by-trial, we make a spreadsheet (this can be made in Excel). Each header is a variable, each row corresponds to the value of that variable on each trial.
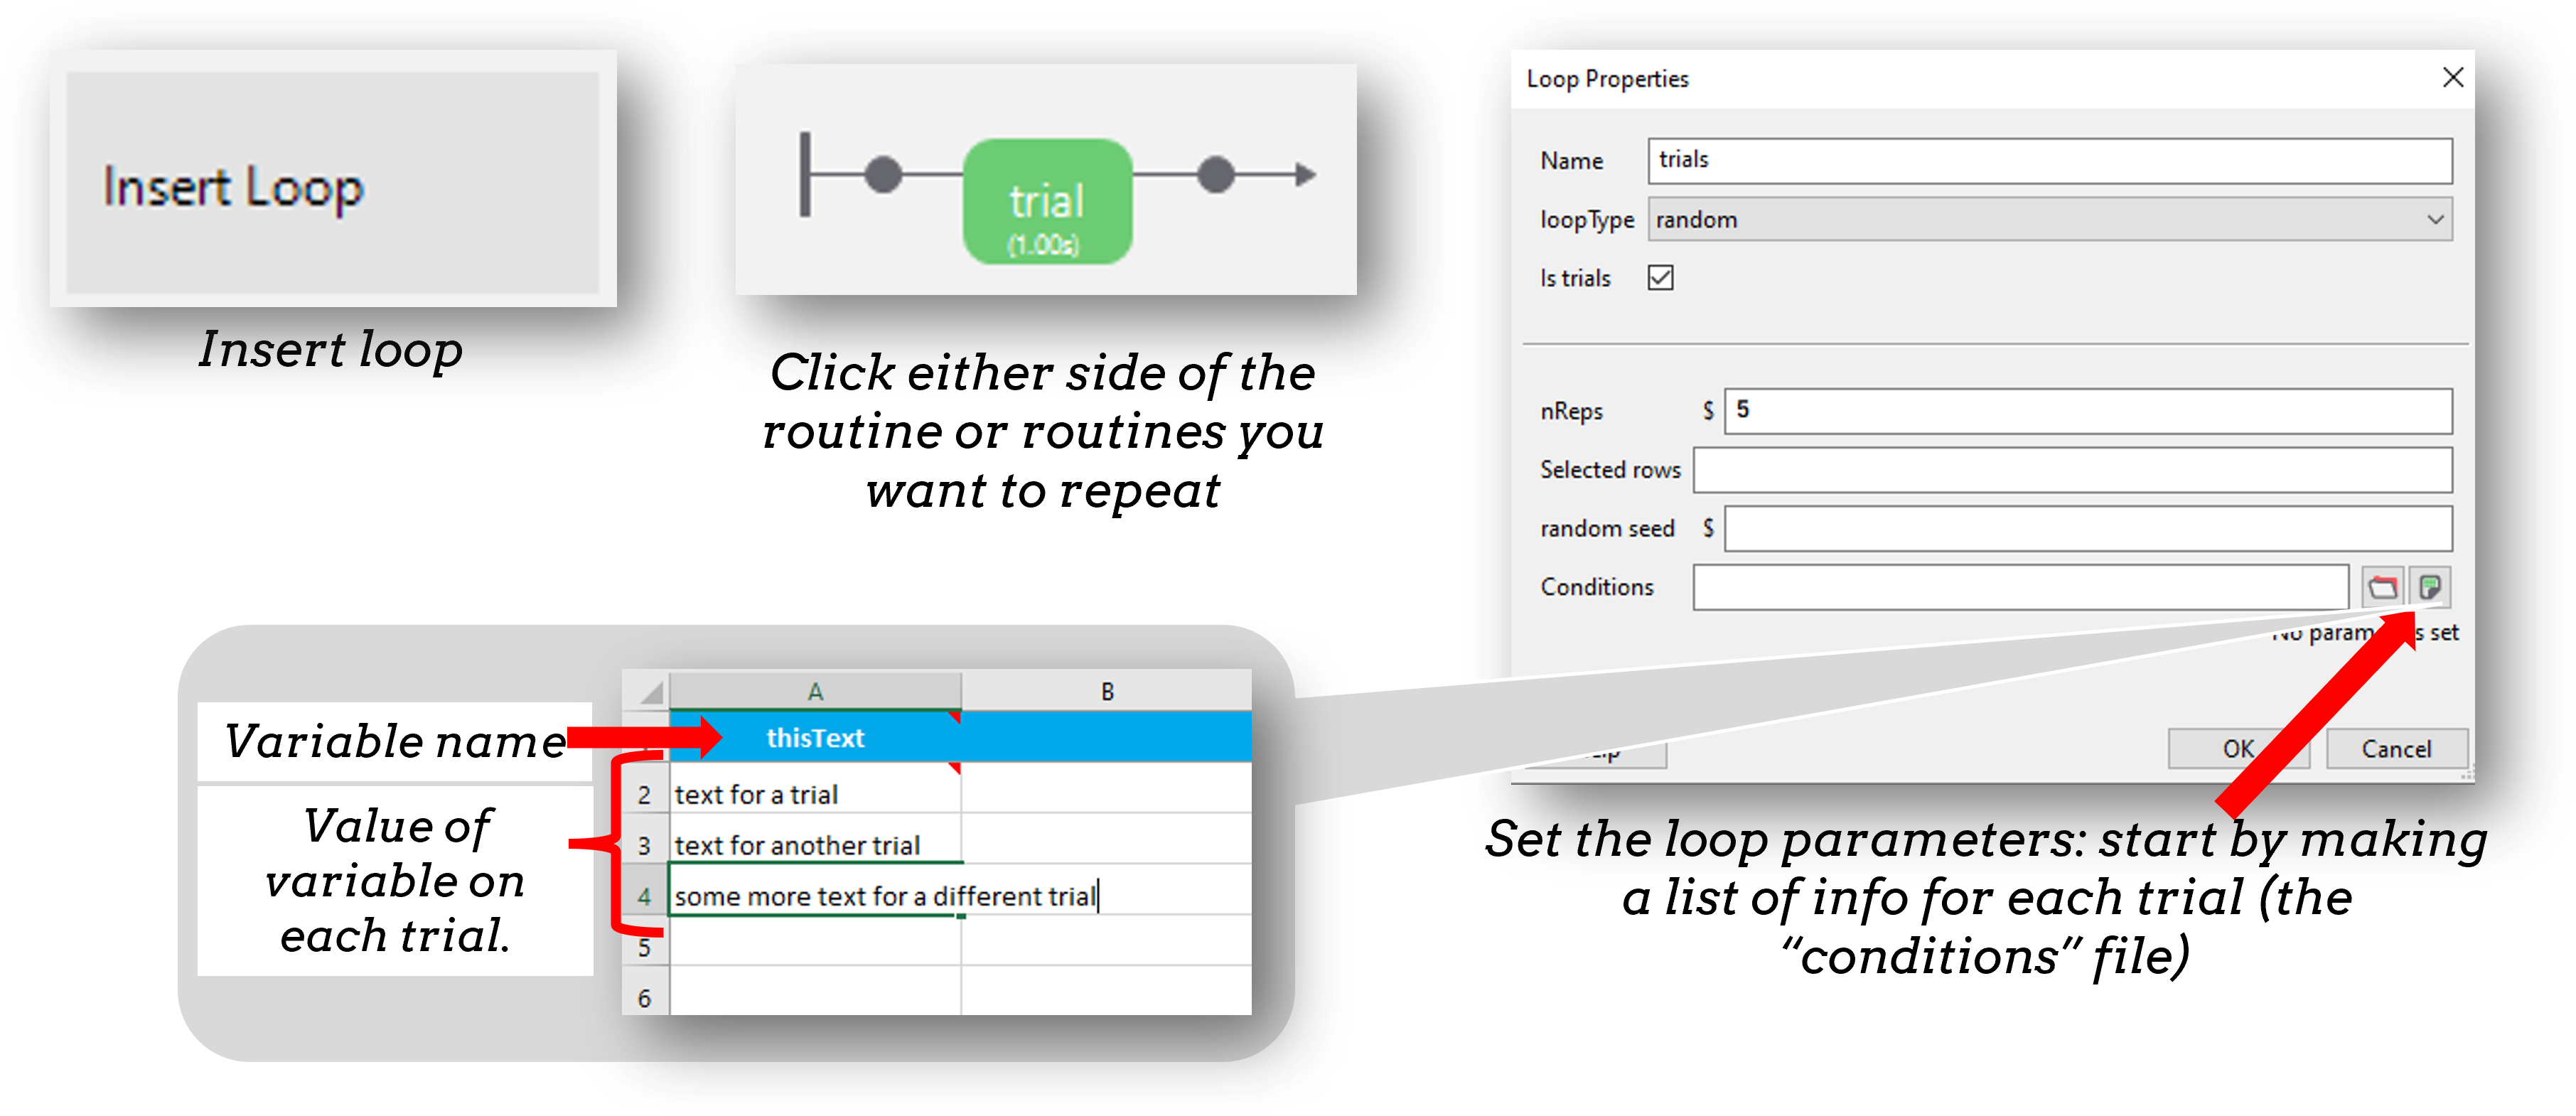
Once we have inserted a loop we can add a spreadsheet of trials to the “conditions” field.
Changing things trial-by-trial (the “conditions” file)
Then make sure to use that variable to set the parameter of a component on every repeat of your loop.
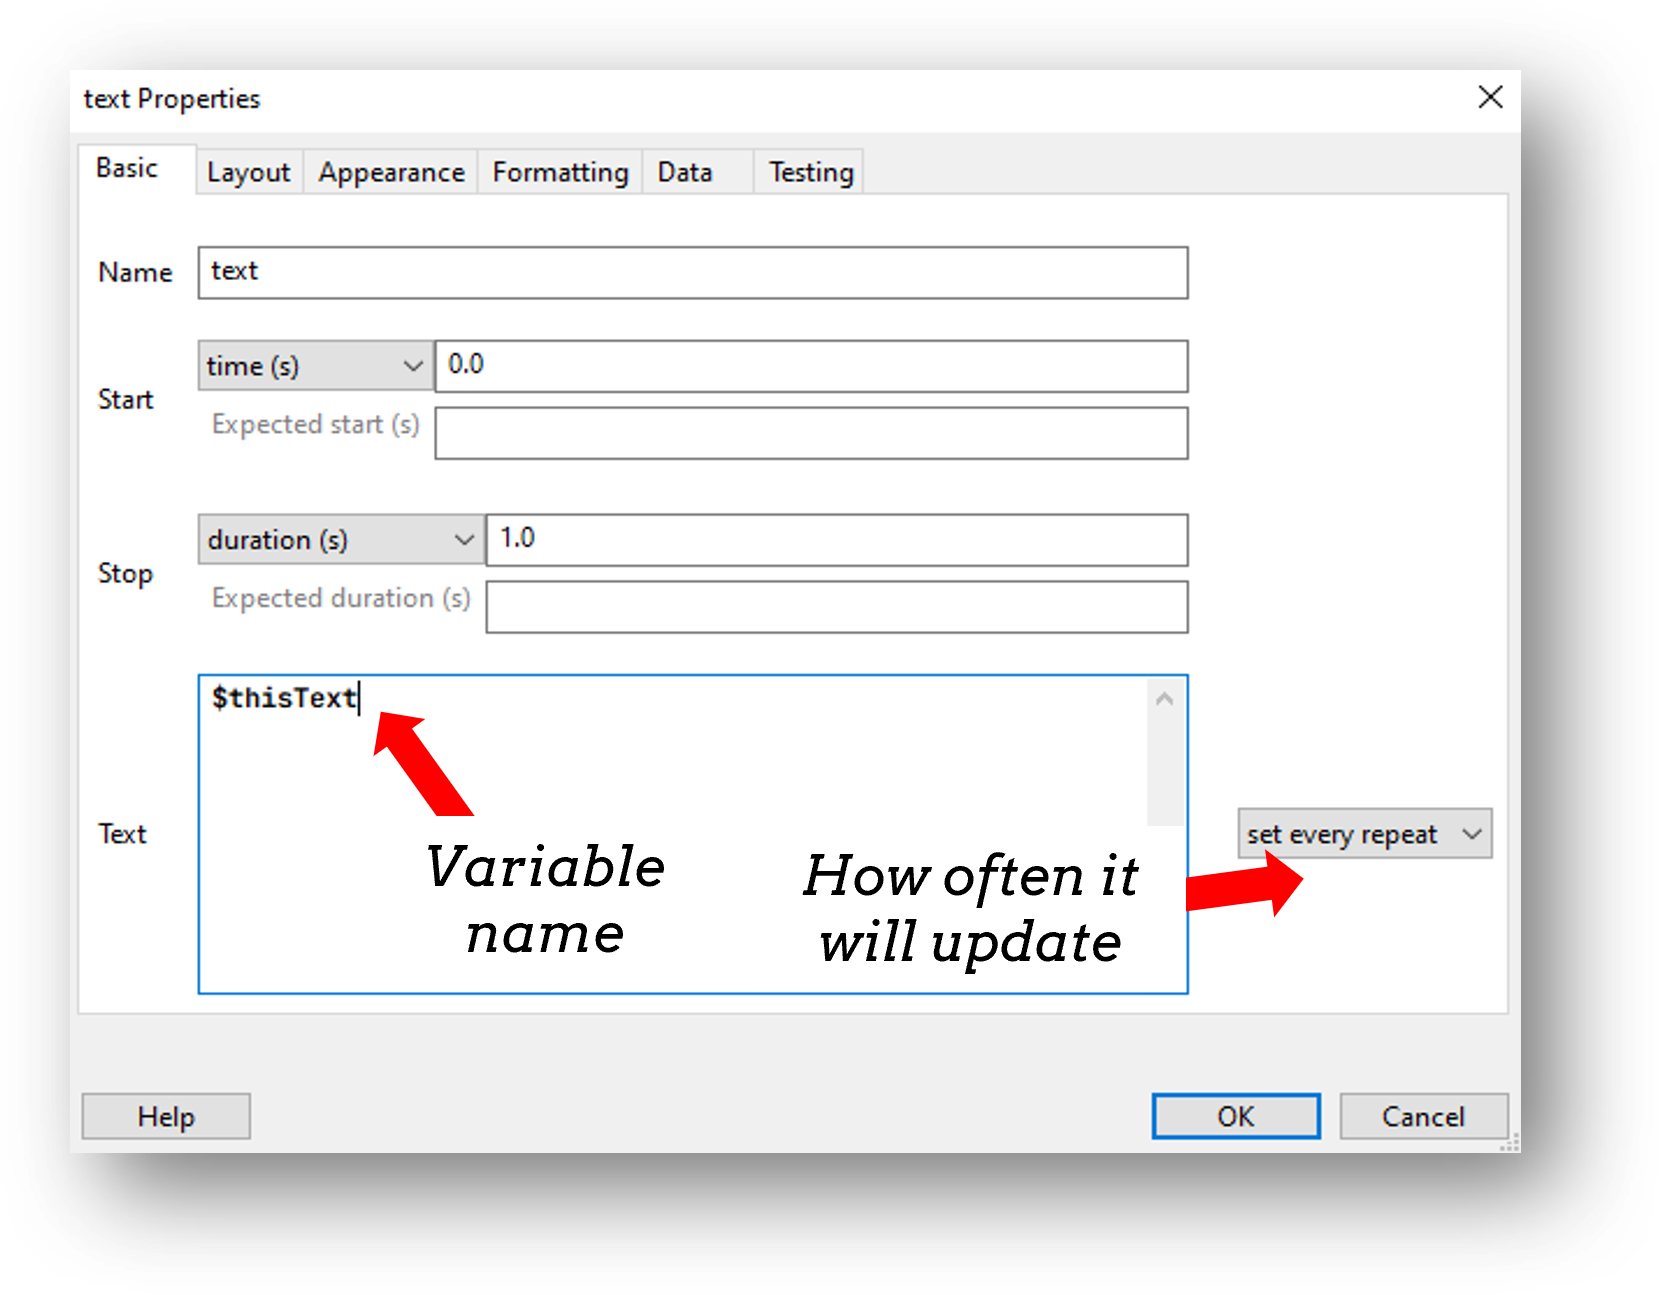
Let’s start by presenting a different pair of numbers on each trial and allowing the participant to press the left and right arrow keys to indicate a number.
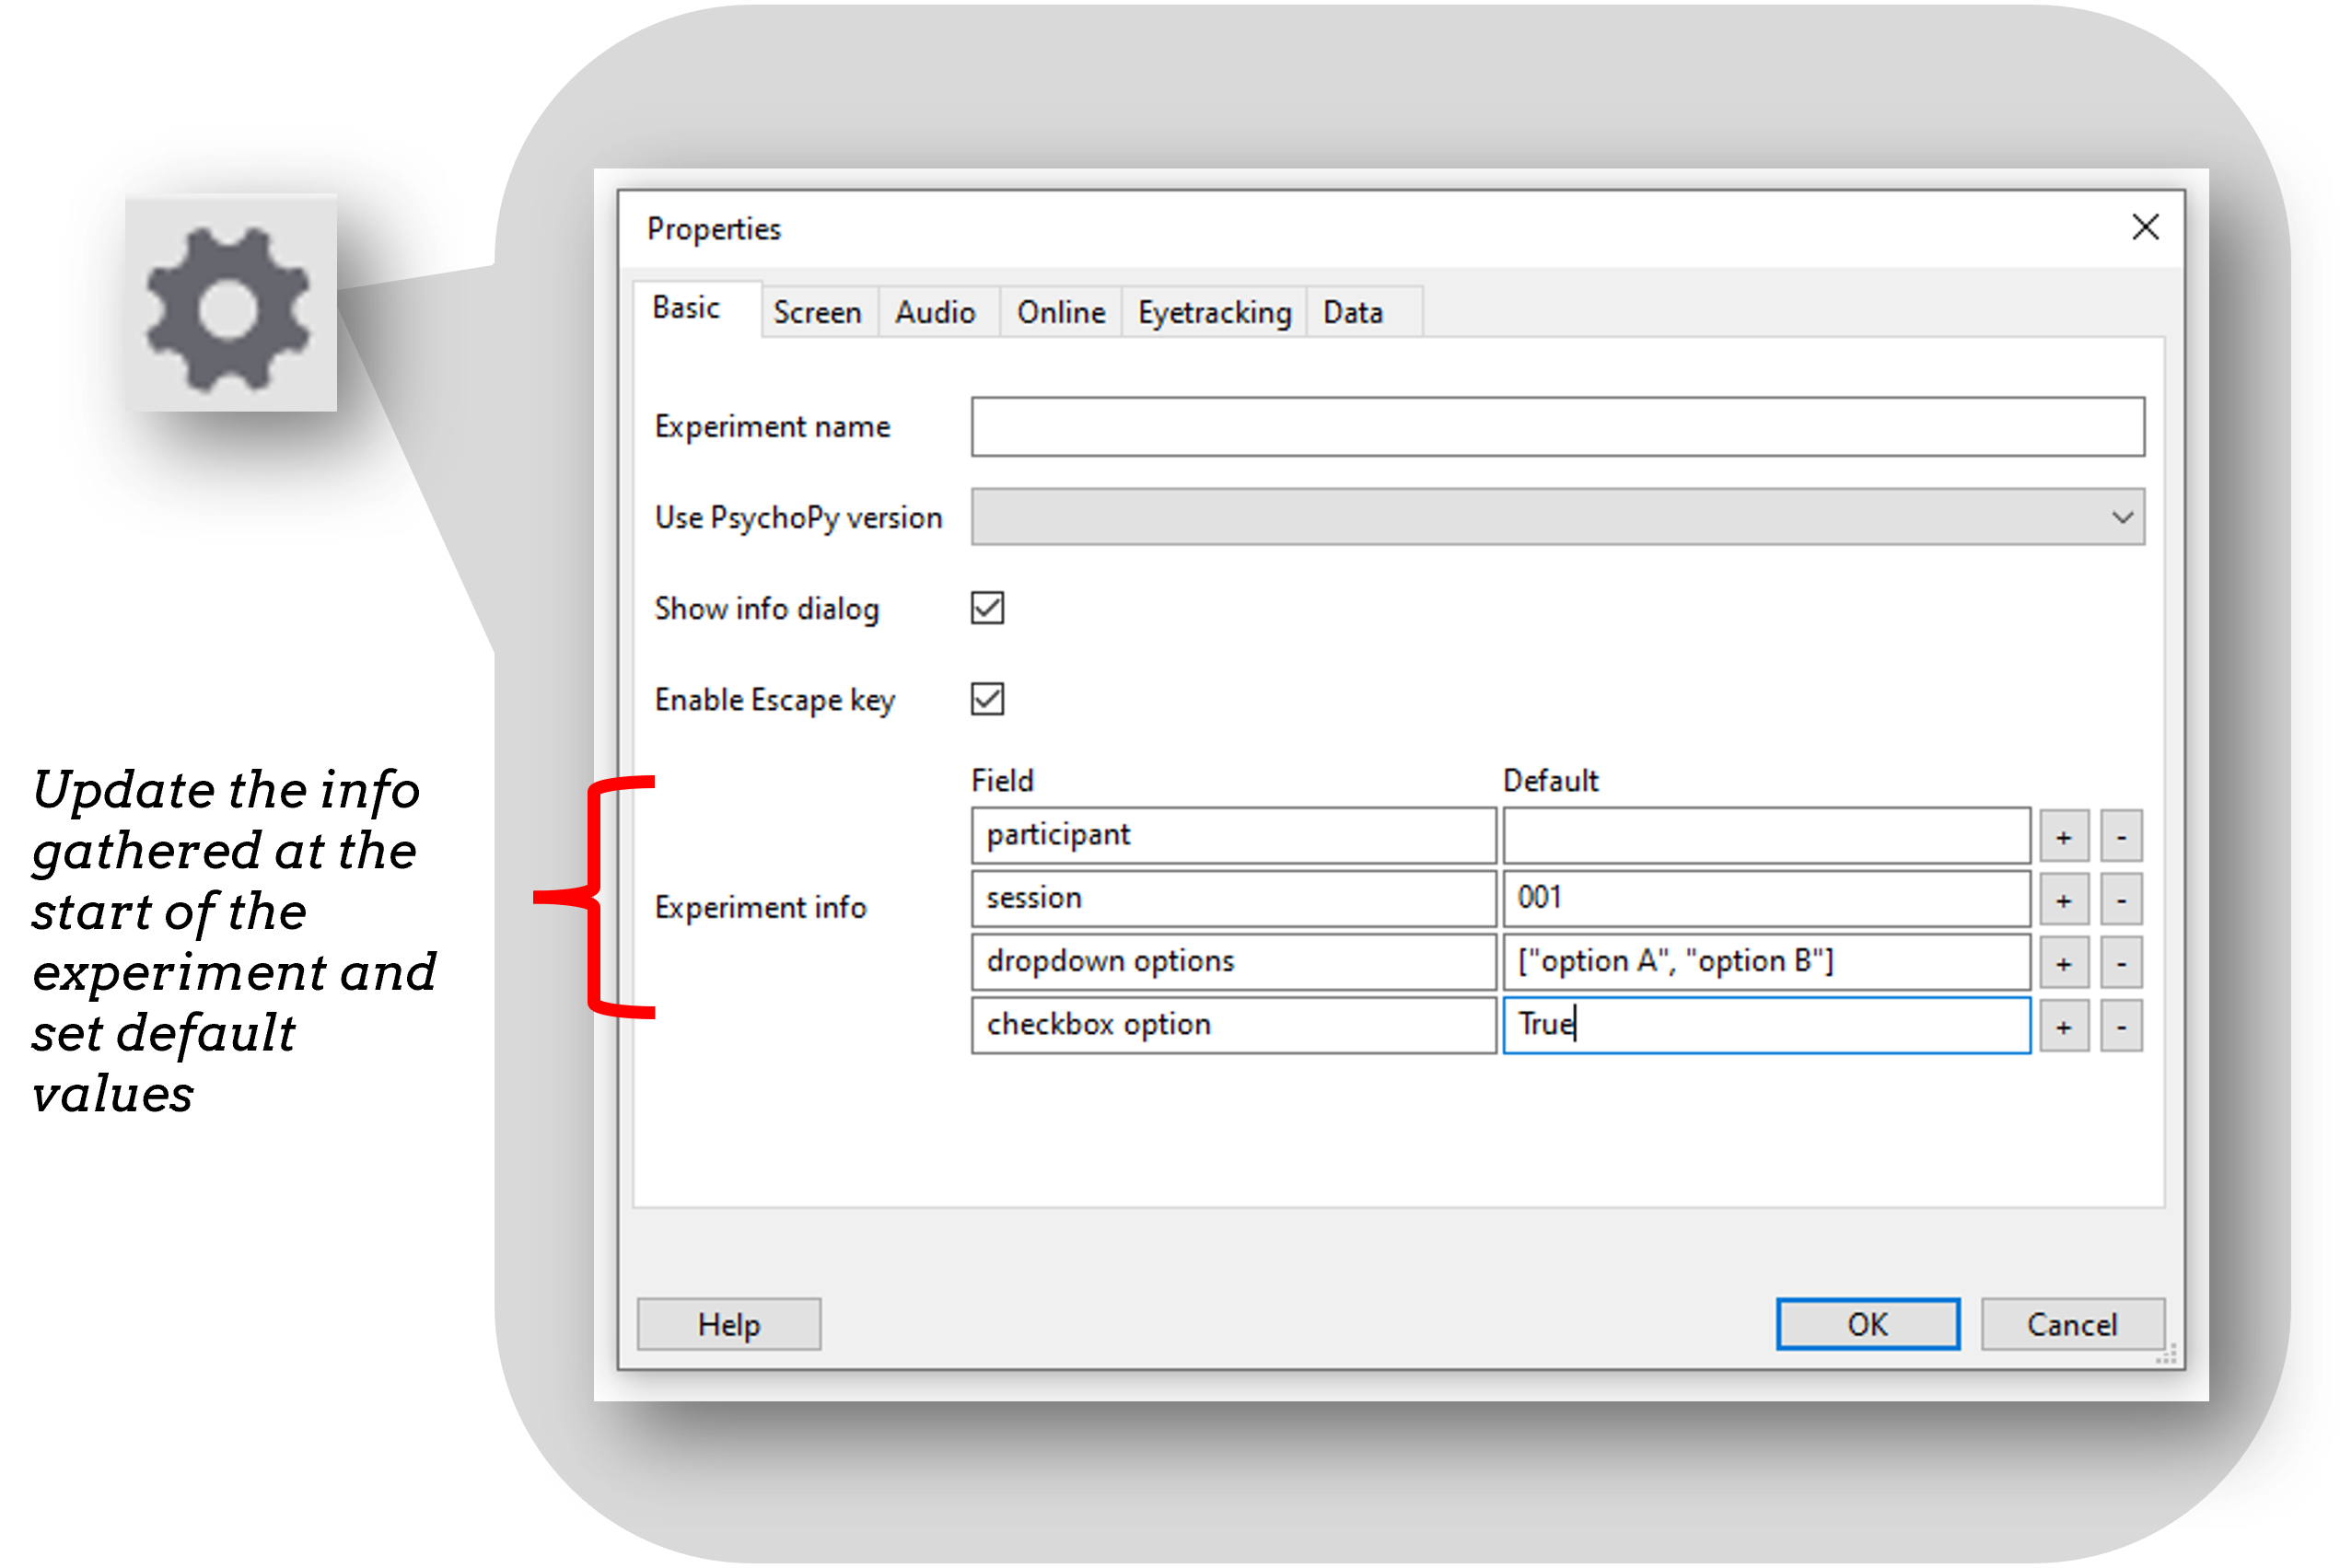
Gather some additional info (e.g. age)
Every experiment starts with a dialog box to gather some info about the participant/experiment. By default “participant” and “session” are gathered - and these are used to set the filename of that participant.
Warm up exercise (10 mins)
- Make the size (letter height) of the numbers change trial.
- Add a column to the conditions spreadsheet to note if this trial is congruent (numerically larger number is also physically larger) or incongruent (numerically larger number is physically smaller).
- Add an instructions routine and a thanks routine to the experiment.
When you are finished, come back to the main session and collect one run of your task so that we can talk through the data file.
Storing accuracy
It is very easy to store accuracy from a keyboard in PsychoPy. In our experiment, the participant can press either the left or right arrow key. So, we add a column to our spreadsheet to indicate what the correct answer is.
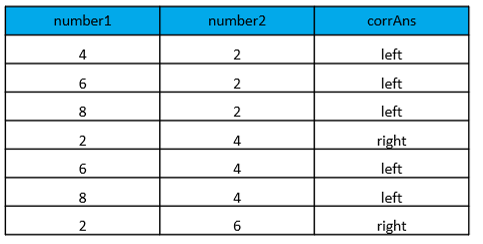
In this example, the numerically larger number is the correct answer. The corrAns column tells us which key is the correct answer.
Storing accuracy
In our keyboard component, we can then select “Store correct” and use the variable $corrAns in the field.
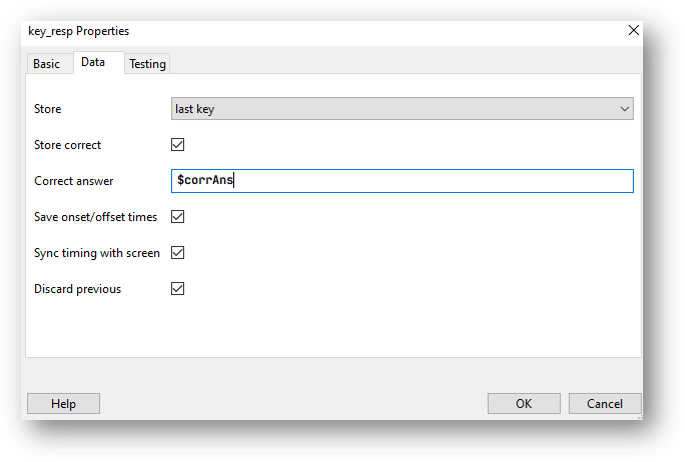
The data tab of the keyboard component, to store the correct answer click “store correct” if the correct answer changes trial by trial use a variable that is set from the spreadsheet.
Block designs and counterbalancing
Randomized block designs
A block design is where we have sets of similar trials organized into blocks rather than having trials interleaved.
- e.g.
- a block of faces to recognize or a block of houses
- a block of Stroop task in English and a block in French
- a block of valid trials versus a block of invalid trials
Note: these are all cases where the components would be identical between blocks.
The natural approach
When people have several “blocks” the natural move is to add separate routines for those blocks:

However, if both blocks contain the same stimuli/elements (e.g. in a Numerical Stroop task where both valid/congruent and incongruent trials contain two numbers and a keyboard response), this is not the most efficient approach.
Blocking: Case 1
Instead of a Routine for each block, create a Routine for all your trials and make it behave differently across the blocks:

Then you can set the conditions files in your blocks loop to control the block-level changes. The outer “blocks” loop then takes a (meta) “conditions” file that specifies which of the conditions files will be loaded in each block.
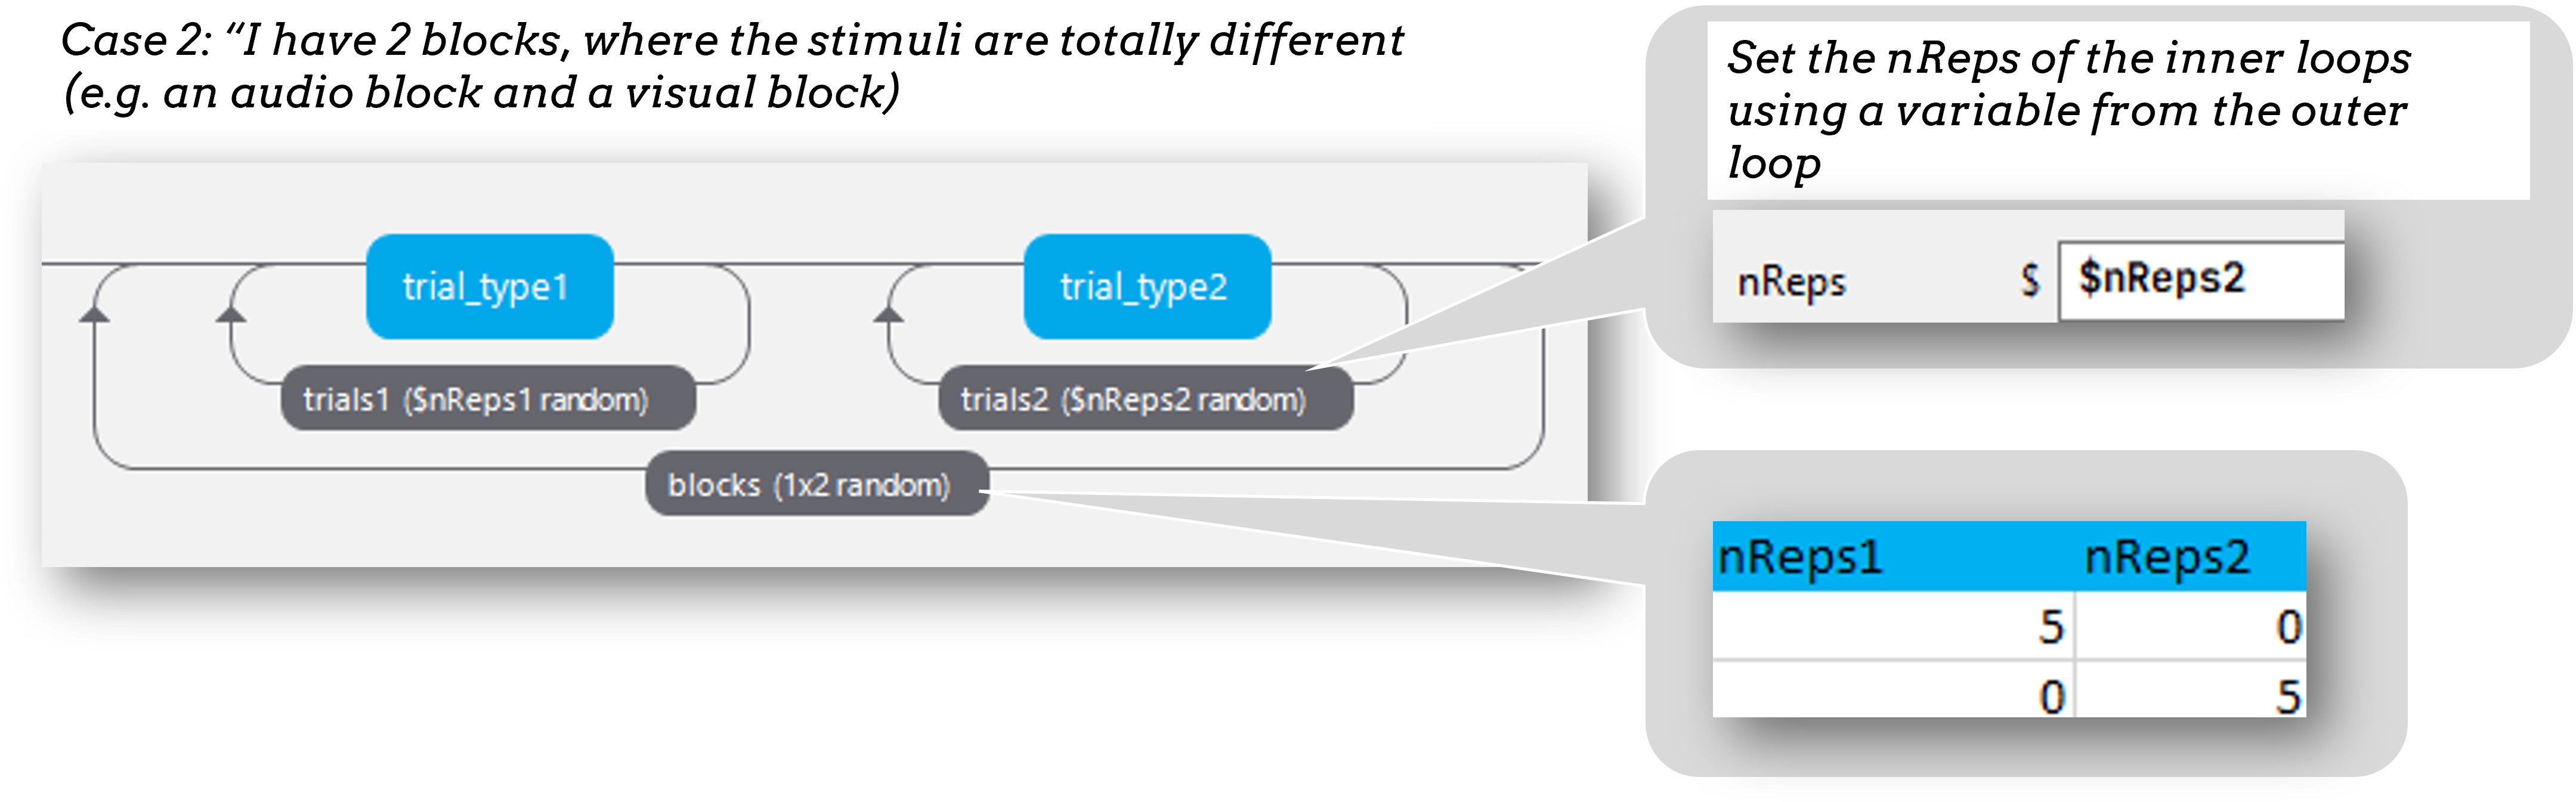
Blocking: Case 2
If you do have two blocks that contain very different stimuli the approach to take is to control the number of times each block repeats using an outer-loop.
Blocking: Our example
Imagine we want our task to include a block of neutral trials and a block of congruent/incongruent trials.
We need to create a total of 3 conditions files:
- neutral_conditions.xlsx
- congruency_conditions.xlsx
- blocks.xlsx (the conditions file used in the outer loop)
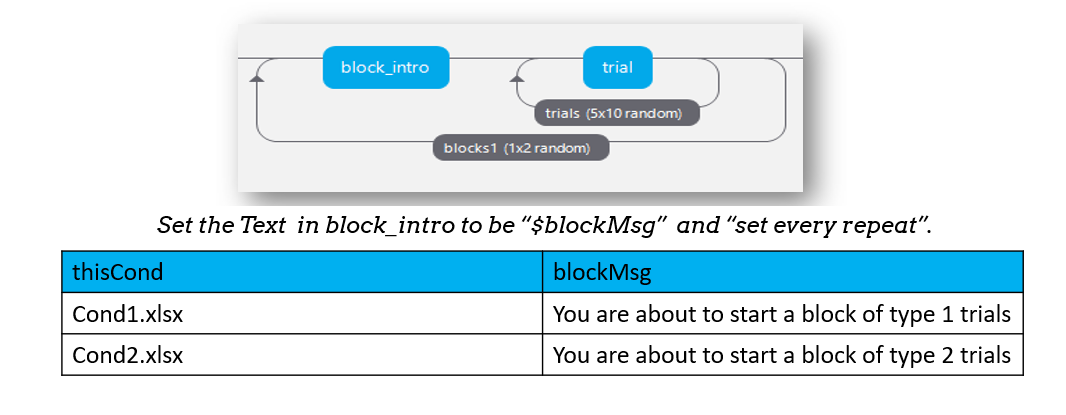
Introducing a block
Using what we know about blocks, we could add a routine to tell the participants what kind of block they are about to enter. If our blocks.xlsx file has a column to label the condition, we can add a routine to introduce the block type.
Randomized block design complete!
You’ve sorted out block designs in a relatively neat fashion.
Just keep clear what differs from one block to the next (for a conditions file) and what stays the same (for the Routine definition).
Counterbalanced designs
Counterbalancing your blocks is really just an extension of the blocking scenario, except that you set the blocks to operate in a particular order rather than leaving PsychoPy to randomize them.
Setting the order
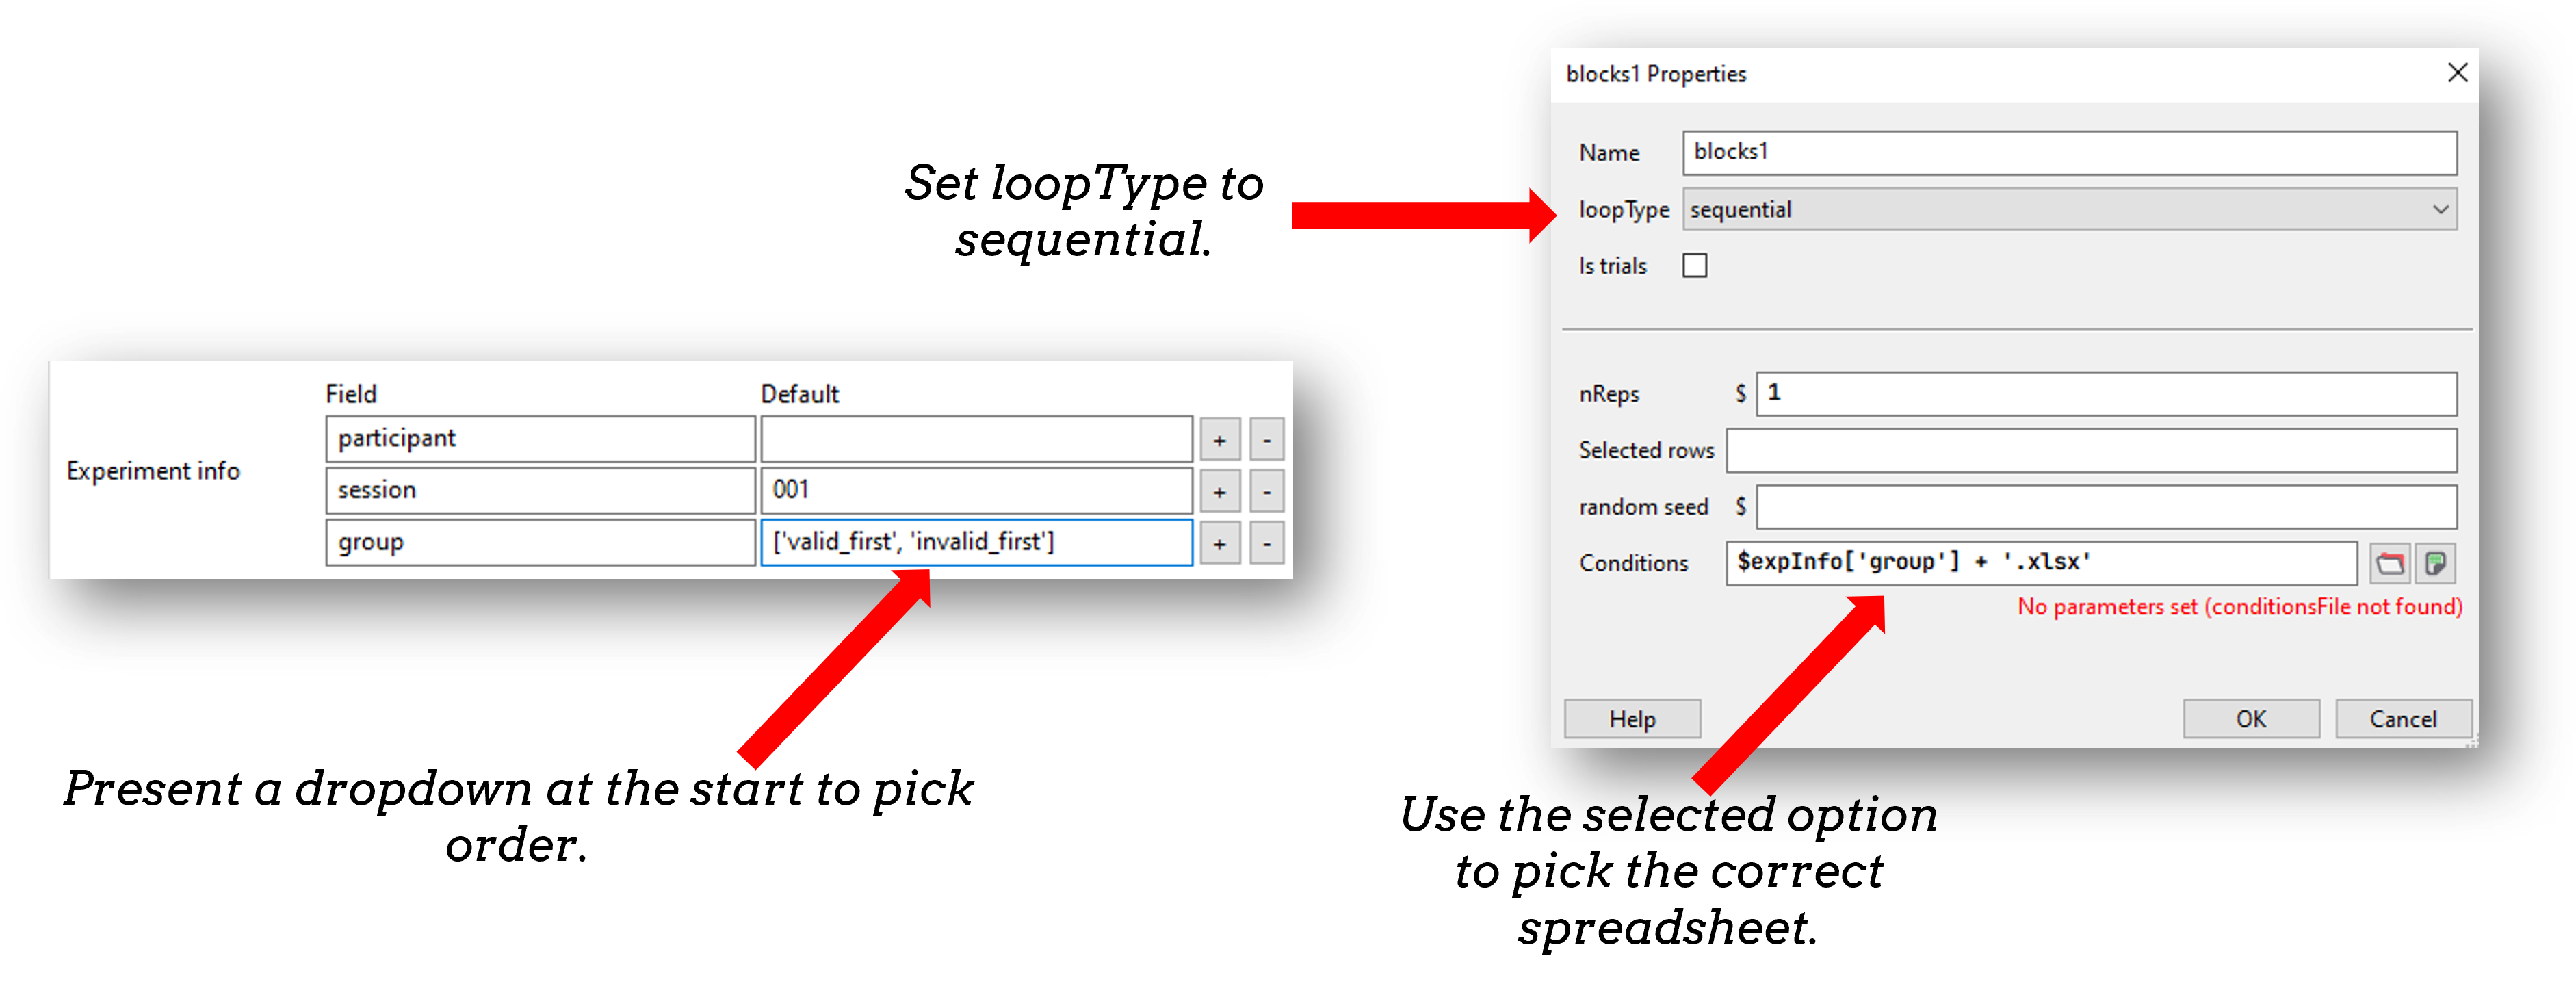
At the moment, PsychoPy doesn’t handle the ordering for you - you need to decide how to create the orders and how to assign participants.
So, you need a file per conditions order (e.g. A -> B and B-> A), then determine which file will be used for this group and use that file in the blocks loop
Remember to set the blocks loop to be `sequential` rather than `random` to preserve the order you set.
How to assign participants to a group
The easiest way is by hand at the start of the run for the participant. The steps are:
In Experiment Settings add a field for group (which will be A, B, C… for however many orders you need)
For the block loop use that value by calling expInfo[‘group’] using the code below:
$"block" + expInfo['group'] + ".xlsx"
How to assign participants to a group
Note
expInfo is a python “dictionary” that stores all information from the startup GUI. Fields of a python dictionary are accessed using the format dictName['fieldName']. It works the same locally and online and means you can set features of your experiment based on the input received at startup!
Exercises
Let’s practice counterbalancing in different ways using the exercises in this folder (“builder > counterbalancingExercises”). In “exercise 1” you will find an inefficiently counterbalanced design. We want to improve this in two phases:
- Turn this inefficient design into a randomized block design. (the cat and dog images are presented in blocks, but in a random order)
- Then turn this into a counterbalanced design. So that group A see cats first and group B see dogs first. (You should be able to input group in the GUI at the start)
When you are finished, come back to the main session, if you run into any error messages please share them (on slack) and we can discuss them.
Counterbalancing subtasks
Sometimes we might have to counterbalance subtasks (i.e. routines that contain very different sets of components).
For this we would use the second blocking method we described earlier. You can wrap a loop around any set of routines and control if it is presented in your experiment, using nReps.
Counterbalancing subtasks
In the below we could control create the order C->B->A by using a conditions file where the nReps of each sub-loop are set per iteration of the outer-loop.
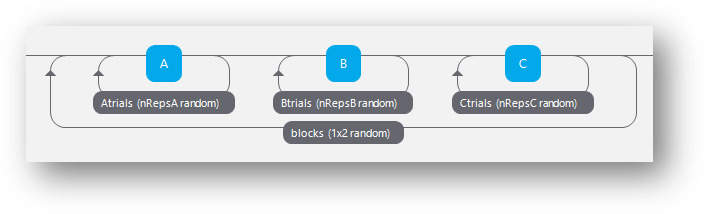
Counterbalancing subtasks
e.g. using a conditions file like this…
| nRepsA | nRepsB | nRepsC |
|---|---|---|
| 0 | 0 | 1 |
| 0 | 1 | 0 |
| 1 | 0 | 1 |
Where the nReps argument of each sub-loop is set using something like ‘$nRepsA’ etc.
Exercise
Open exercise 2 in the counterbalanceExercises folder. This is very similar to our last task, but this time our two routines present different kinds of components, so we need to use a different method of counterbalancing.
We want a design where groupA sees cat images first and group B sees cat words first. Counterbalance this flow using the nReps arguments in the loops.
All done!
You can now create trials and blocks in any order, fixed or random and counterbalance subtasks!
You’re in complete control (but you need to understand what orders you want!)
Up next online