
Interested in being a contributor for PsychoPy? As an open-source software, you can have access to all the source code to add or change something. You can also have a first peek at what new features are being developed and provide feedback! And one of the ways you can do this is by accessing the source code using PyCharm.
PyCharm is a dedicated Python Integrated Development Environment (IDE), which includes, code assistance, visual debugging and version control integration (jetbrains.com, December 2021).
Below you will find step-by-step guidance on how to install PyCharm and accessing the PsychoPy source code. Before you get started, you will first need to install PyCharm onto your computer. The version of PyCharm used in this tutorial is PyCharm Community as it is also free and open-sourced. You will also need a Github account. Finally, we do not recommend running your studies via PyCharm but instead use it only for debugging and development purposes.
Once you have downloaded and installed PyCharm, when you open it for the first time, you will be shown a Welcome Screen and be prompted to create a new project, open or check out an existing project.
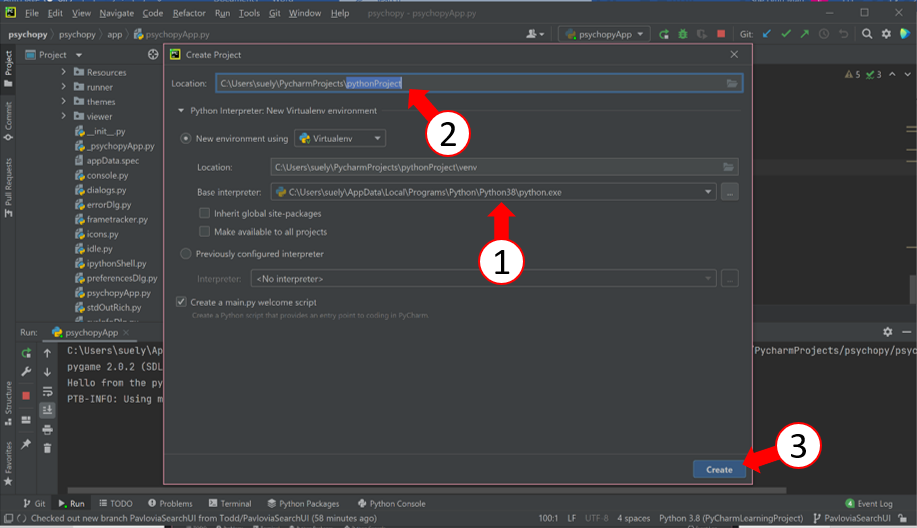
After selecting new project:
Check that the base interpreter (i.e. which version of python you’re using) is the one you want to use - currently should be set to python 3.8).
Click on create once you have named your project.
The PsychoPy source code is located at Github. To access it, you would need to connect PyCharm to Github.
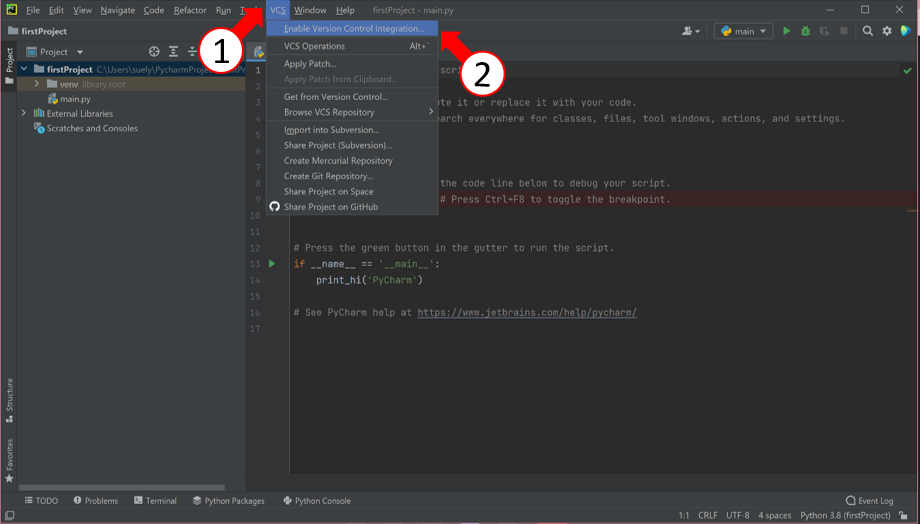
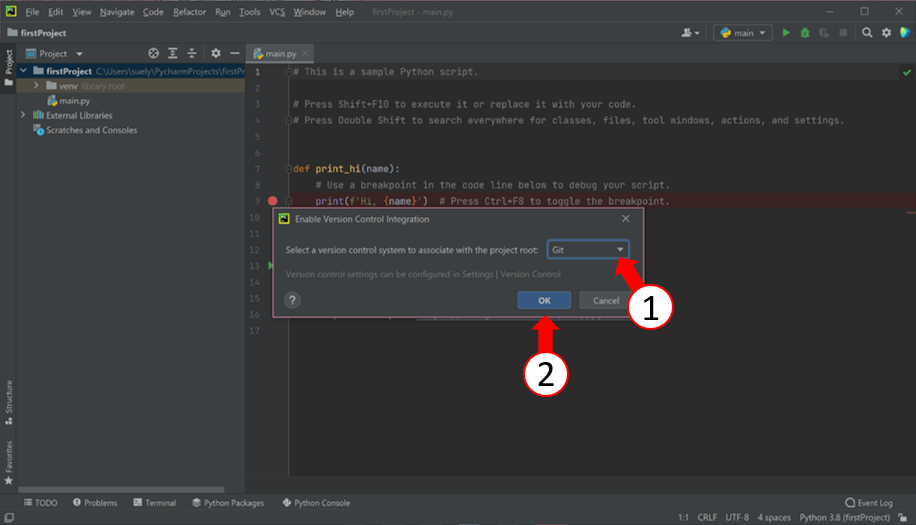
At the top ribbon, select VCS > Enable Version Control Integration.
From the dropdown button, select Git and click OK.
If a message pops up saying that Git is not installed, install Git now.
When you sync your PsychoPy experiment to Pavlovia, you are pushing or sharing it onto Gitlab. It is the same principle here when you have made some edits to the source code or documentation. When you are happy with your changes, you can share it to Github, similar to syncing your studies to Pavlovia. And when you open Github, you will see the project you just shared in your branch, like when you see your studies in Dashboard -> Experiments on Pavlovia.
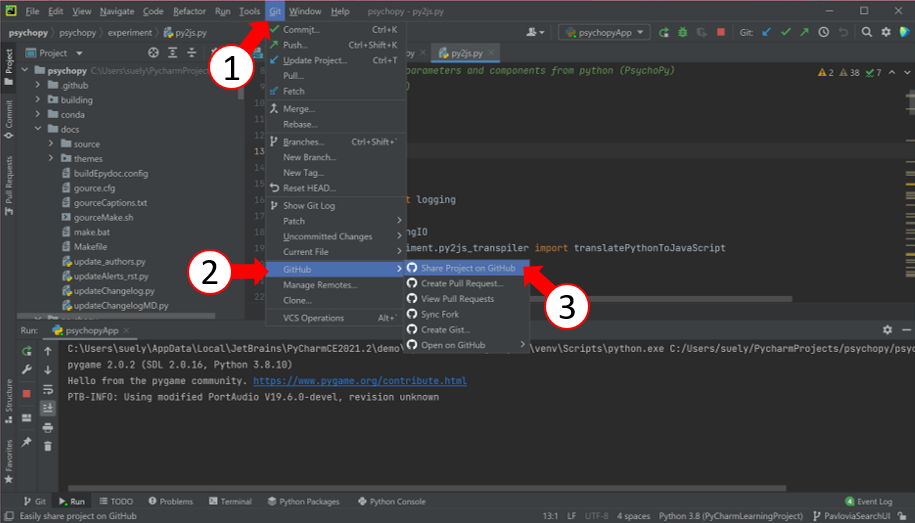
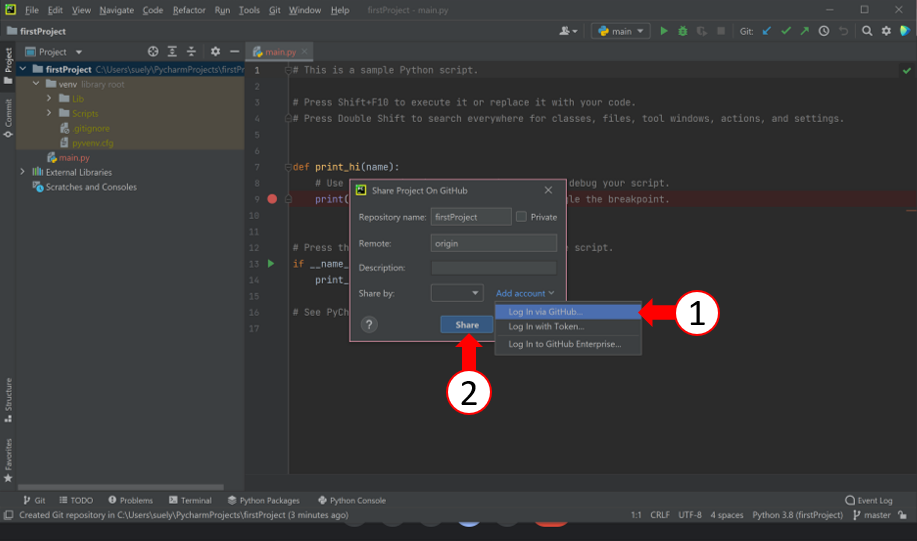
To share your project to Github, click Git > Github > Share Project on Github.
Click on the Add account dropdown to login to Github.
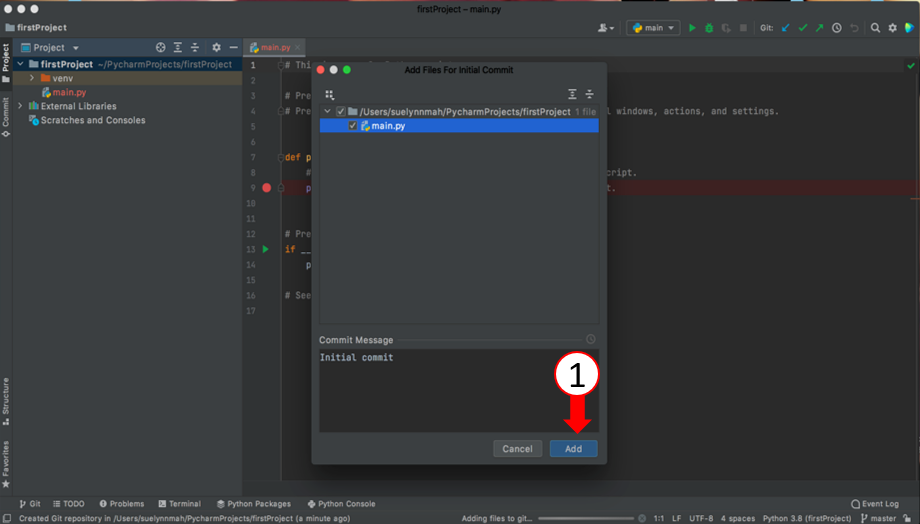
An additional window might appear to share/add the project on Github.
To have local access to the PsychoPy source code on your computer, you need to clone it from Github. This is similar to how we would fork a demo from Pavlovia.
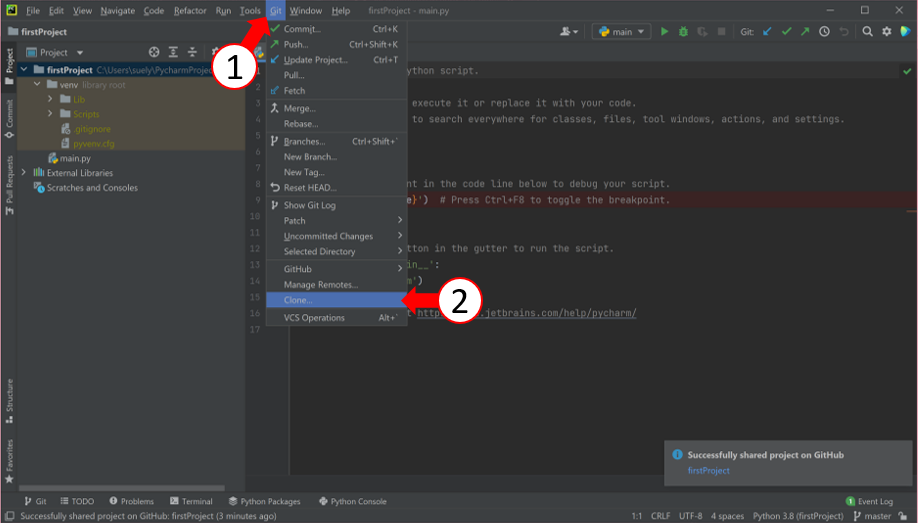
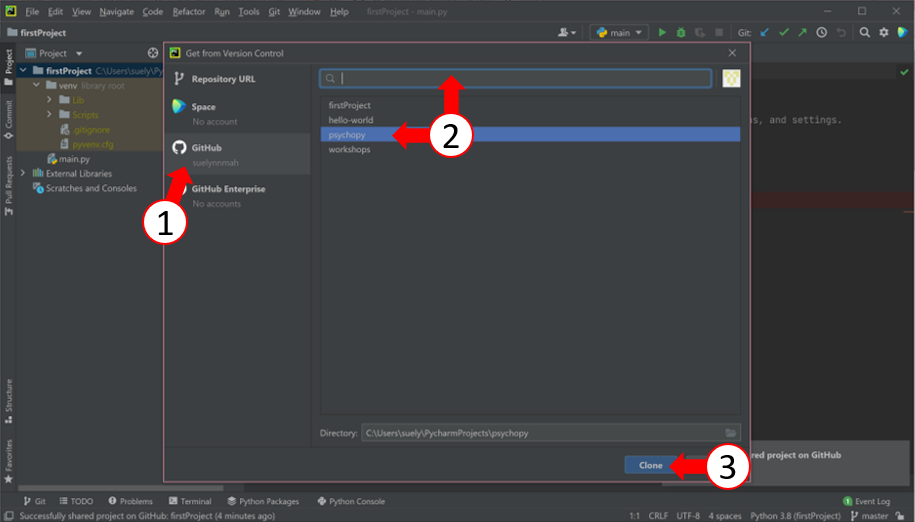
Click Git > Clone.
Click on psychopy or enter the URL.
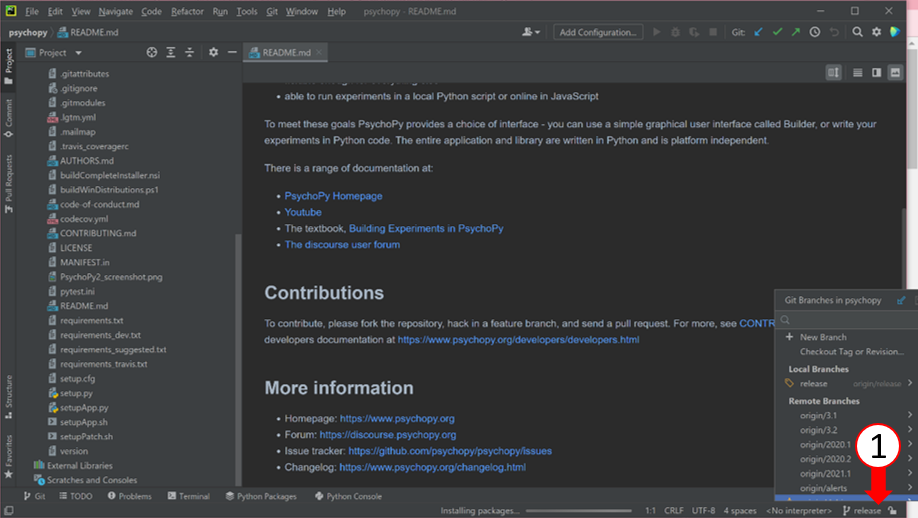
Click on release at the bottom right to see all the different versions of PsychoPy.
To have a sneak peek at the newest version of PsychoPy or even access previous versions, you can do so by following the instructions below.

At the left side panel, click on psychopy > app > psychopyApp.py.
It will open as a python script. Right click anywhere at the script or click on the green play button at the top right panel to run the script.
For first time users, most modules to run PsychoPy not as a standalone version will have not been installed and therefore an error message would appear.
To install modules:
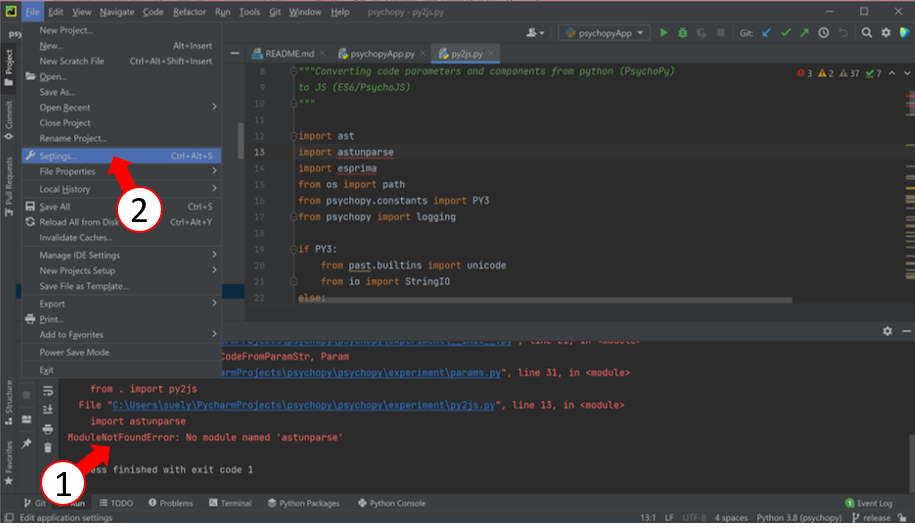
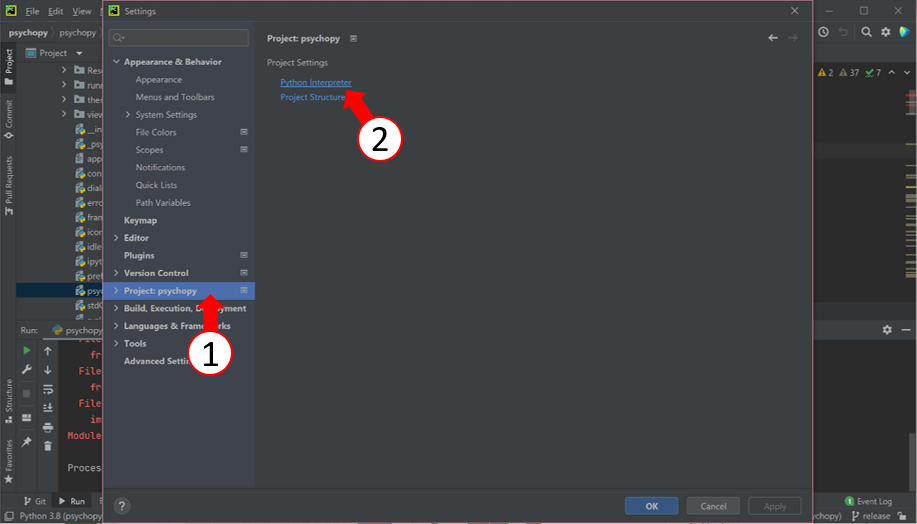
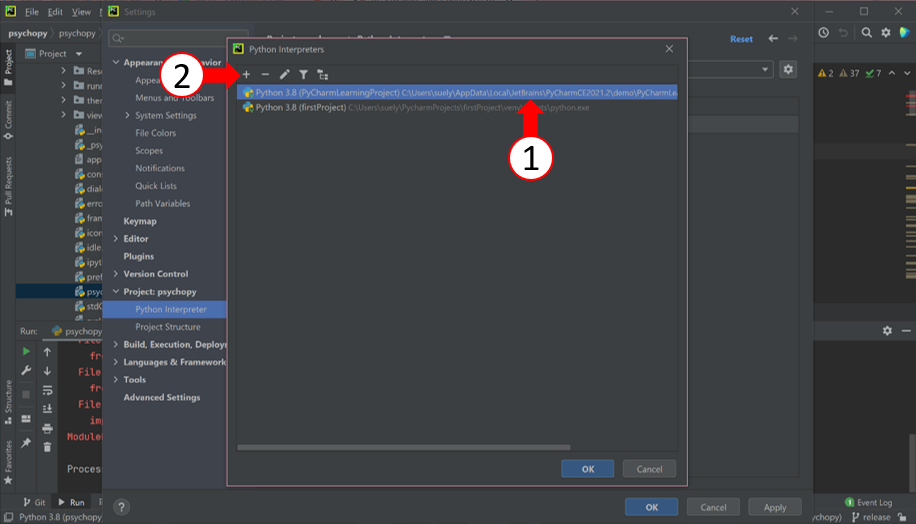

Install modules from File > Settings > Project: psychopy > Python Interpreter.
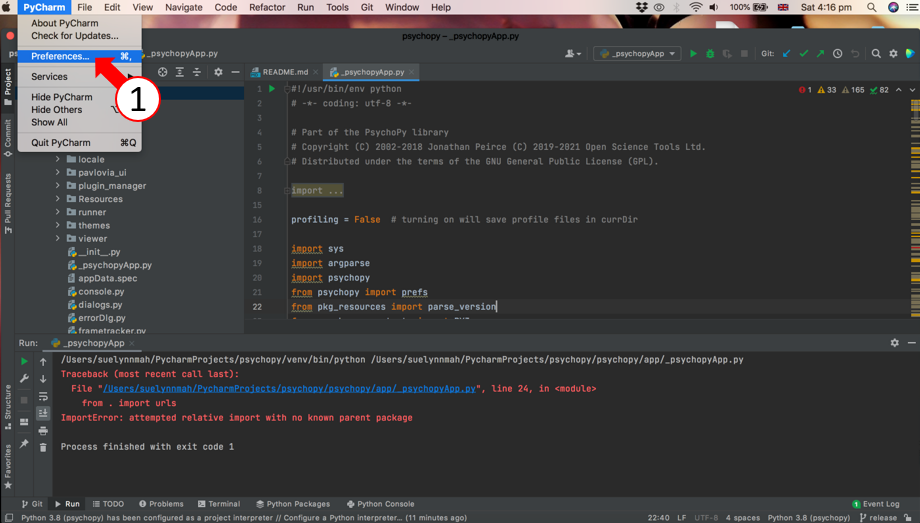
On a Mac, click on PyCharm > Preferences to open up your Settings.
After choosing the python interpreter you want, click on the + at the top panel.
At the search bar, search psychopy to install.
After installing, re-run the script to open PsychoPy.
We are always taking note of feedback from users and aim to develop and improve components to make better experiments. Therefore, if you would like to try out a specific new feature, you can do so by following the steps below.
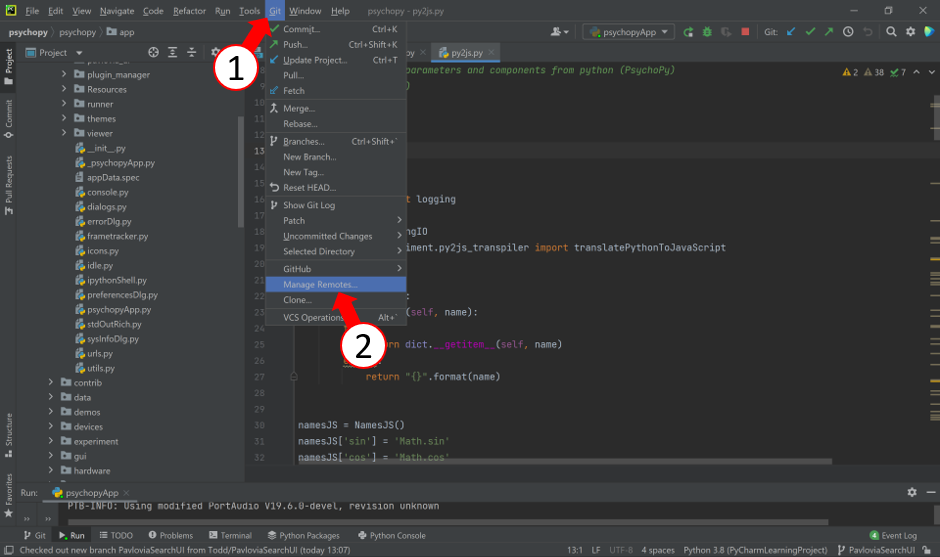

To access the developer version, select Git > Manage Remotes.
A window will appear showing the developers we can currently access. For first time users, there would only be origin, which is our own repository.
Click on the + and at the Define Remote window, add the name of the developer you want to add and their Github URL.
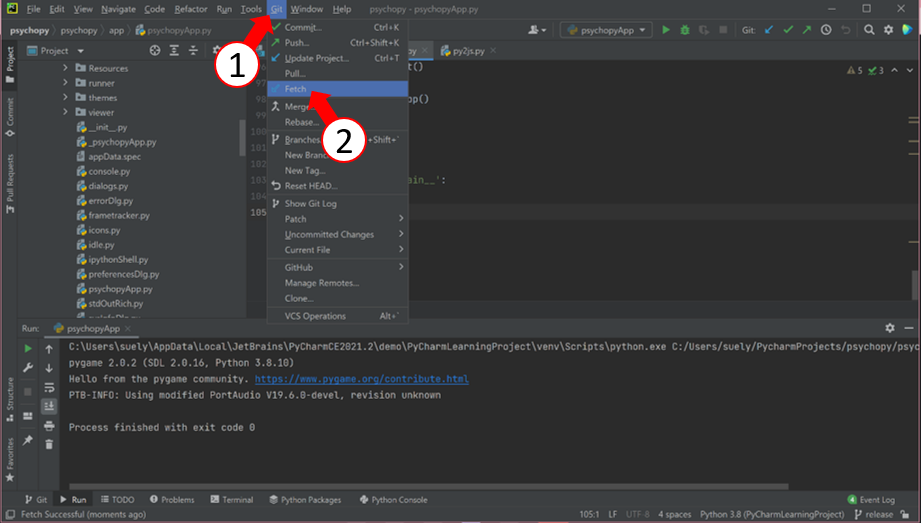
Click on Git > Fetch to sync the developer’s repository.
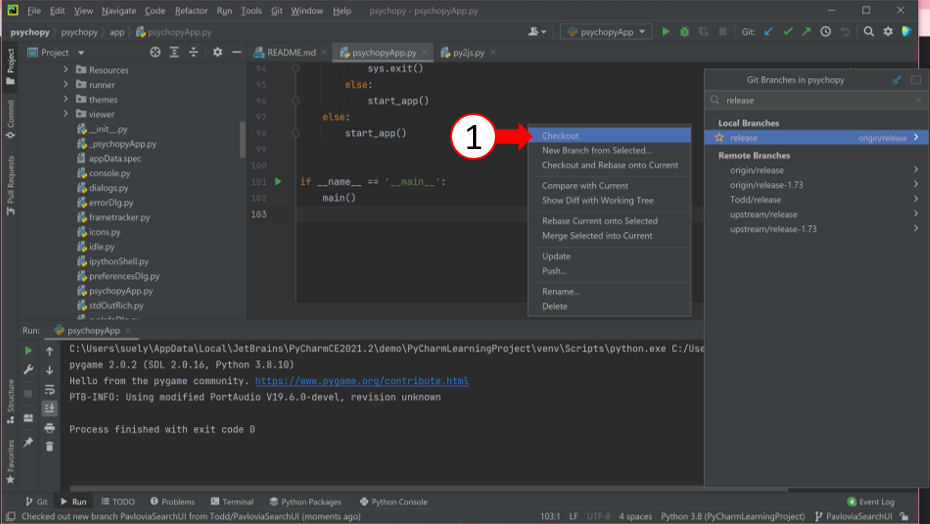
To access a new component of PsychoPy, search from the release at the bottom of the right screen.
Click on the component name > Checkout.
Return to psychopyApp.py and run the script to use the component in PsychoPy.