
A builder experiment has three main sections. To start making an experiment we add routines to our flow and add components to our routines.
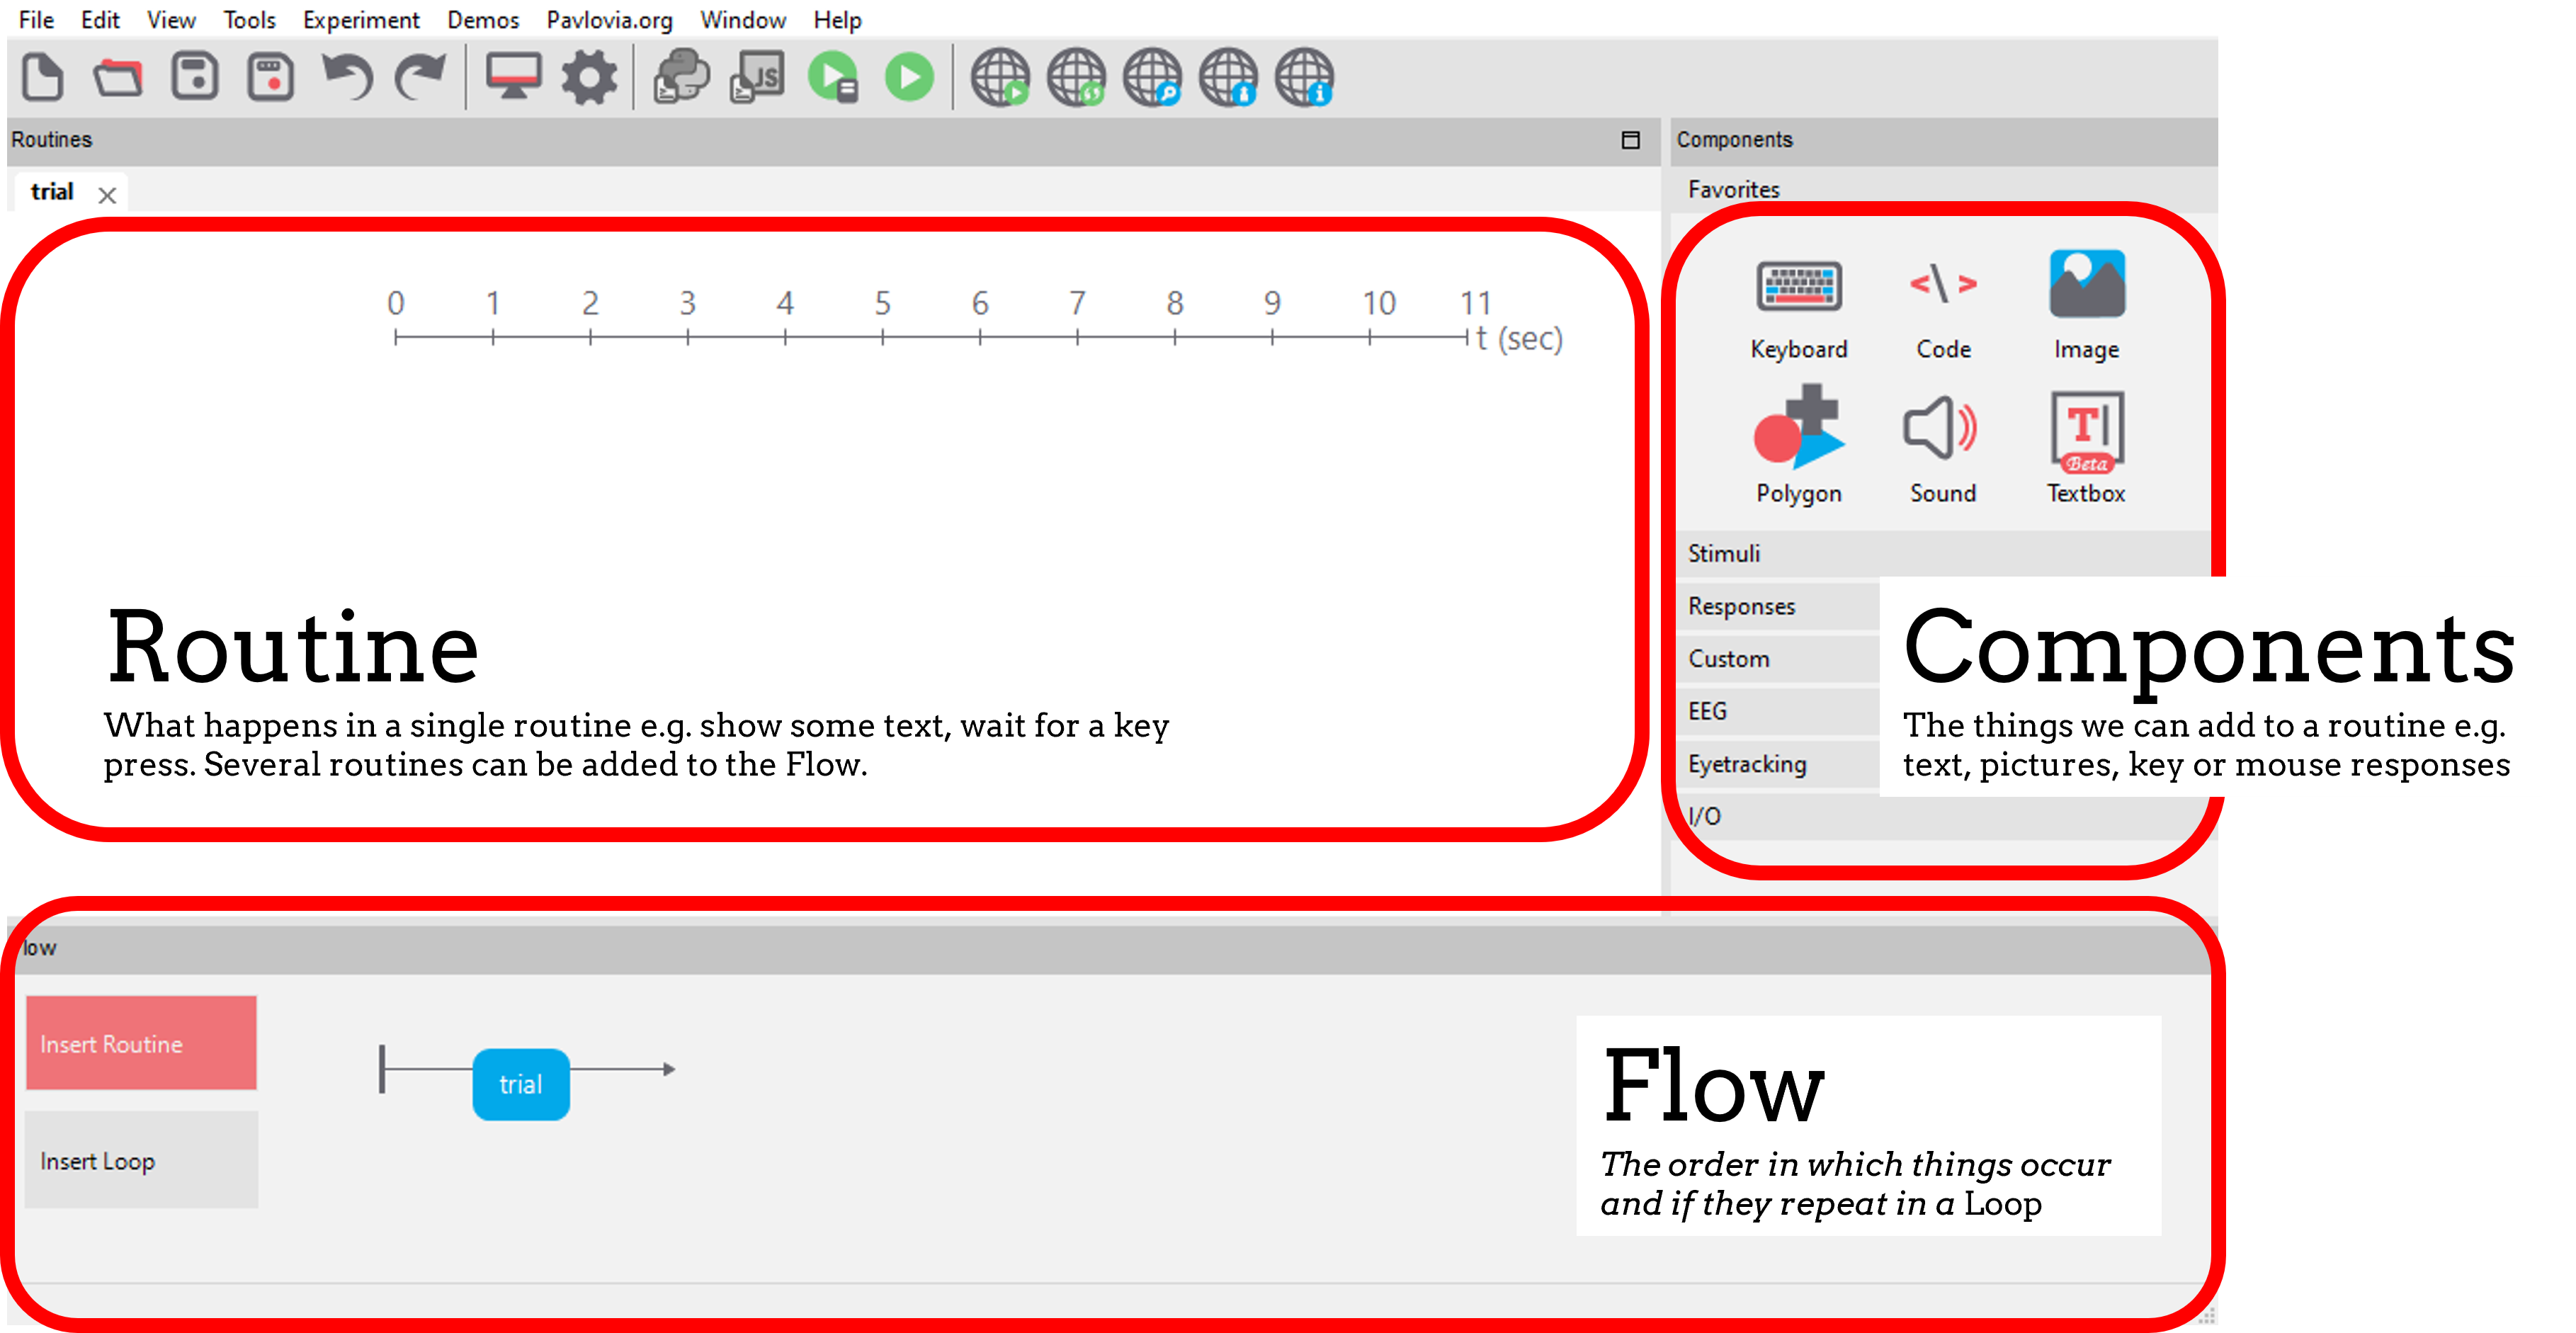
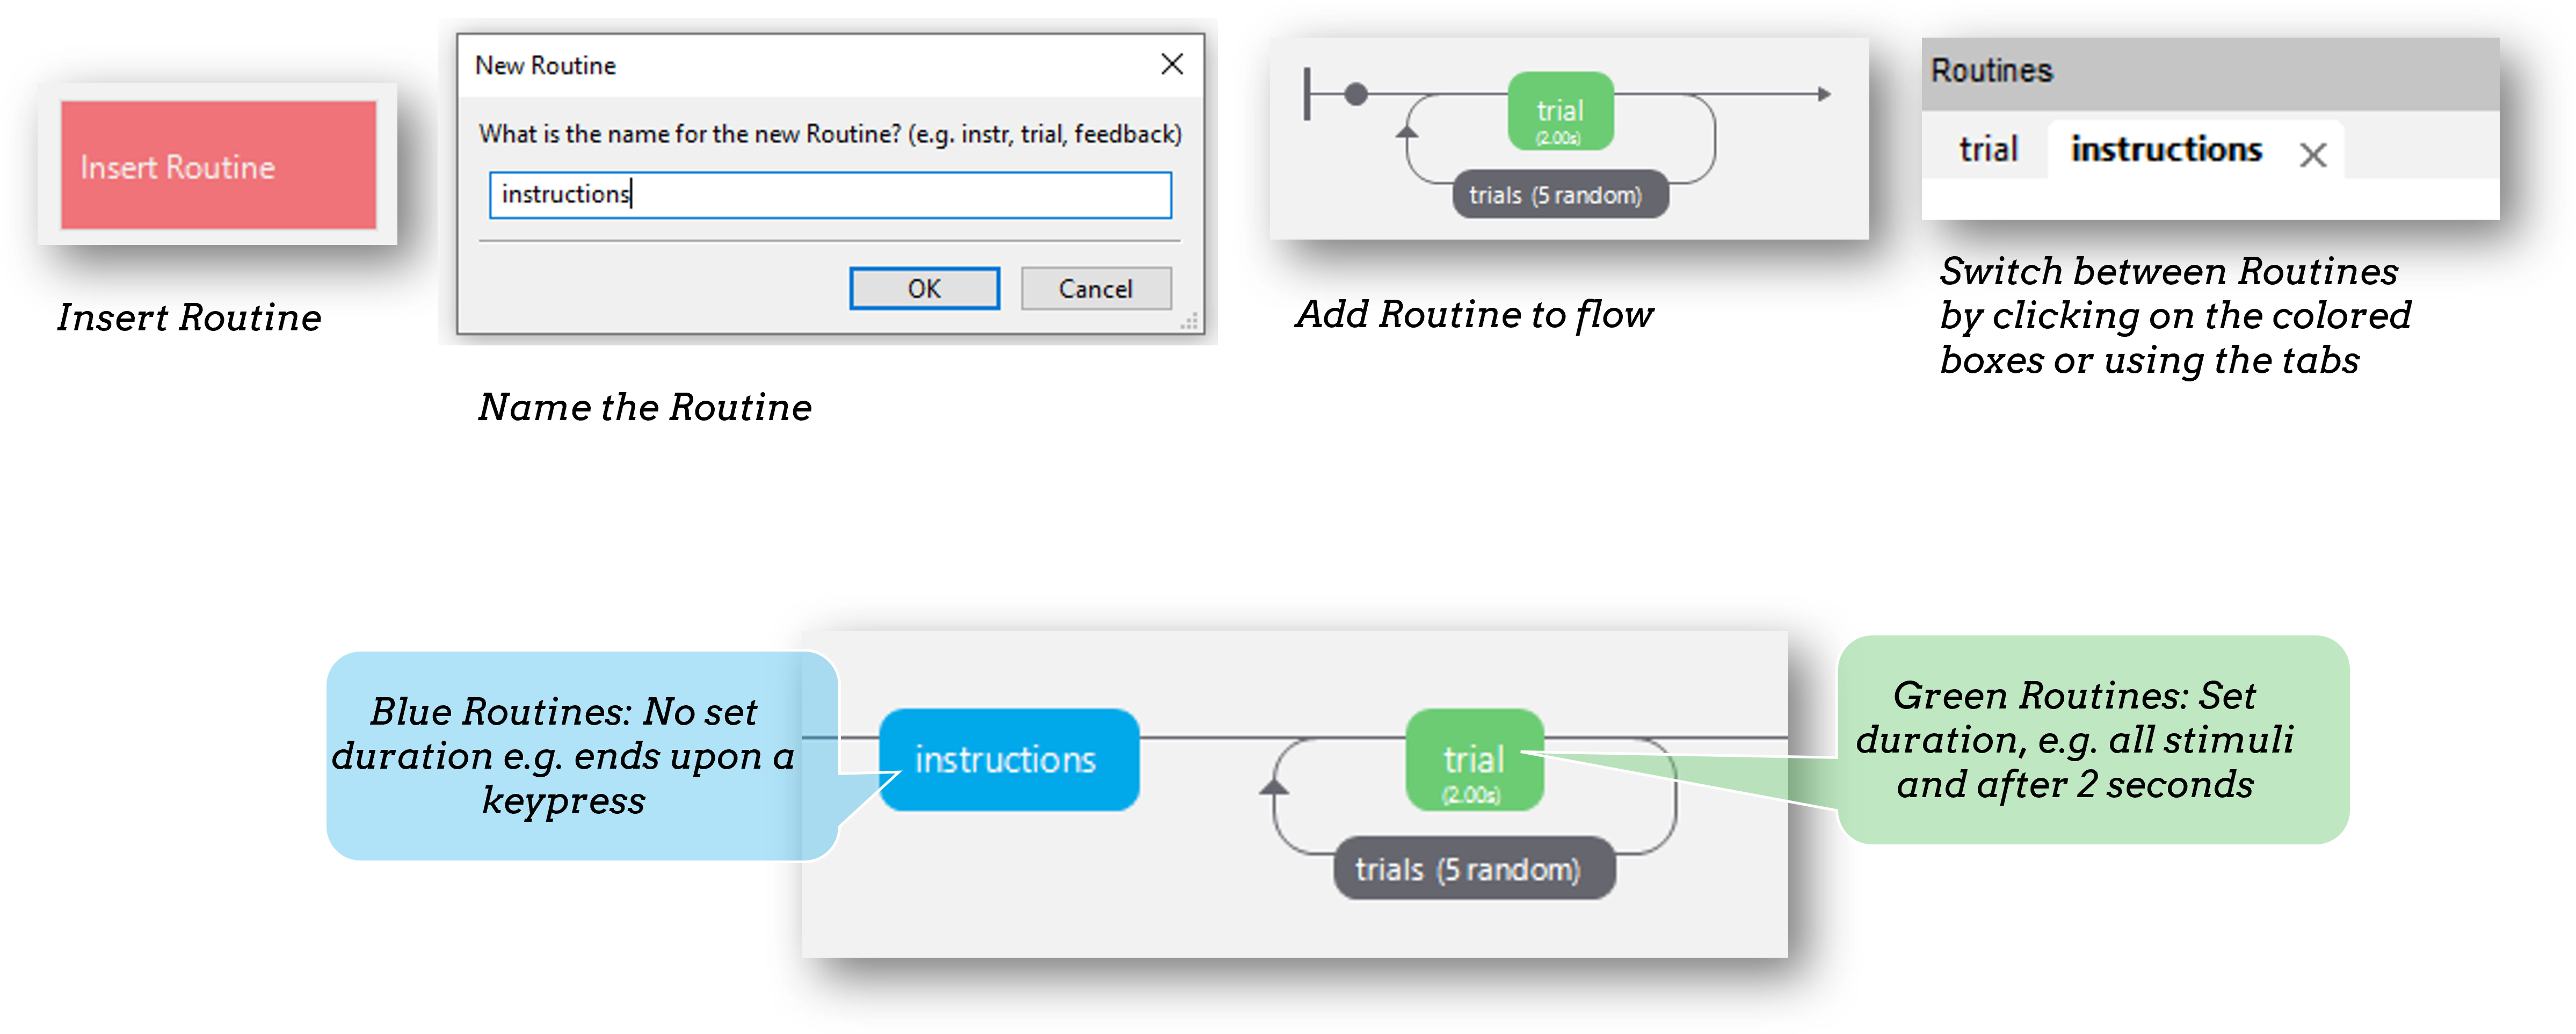
A Routine is the basic building block of PsychoPy experiments. You can add routines to your flow by selecting “insert routine” on your flow panel > new > name your routine and insert on the flow.
The next step is to add components to your routine. Think about what your trial will present, and how long each stimulus is on the screen for. For example, we might want some text (you can find this in the stimuli section) and a keyboard response (you can find this in the responses section).
Every experiment starts with a dialog box to gather some info about the participant/experiment. By default “participant” and “session” are gathered - and these are used to set the filename of that participant.
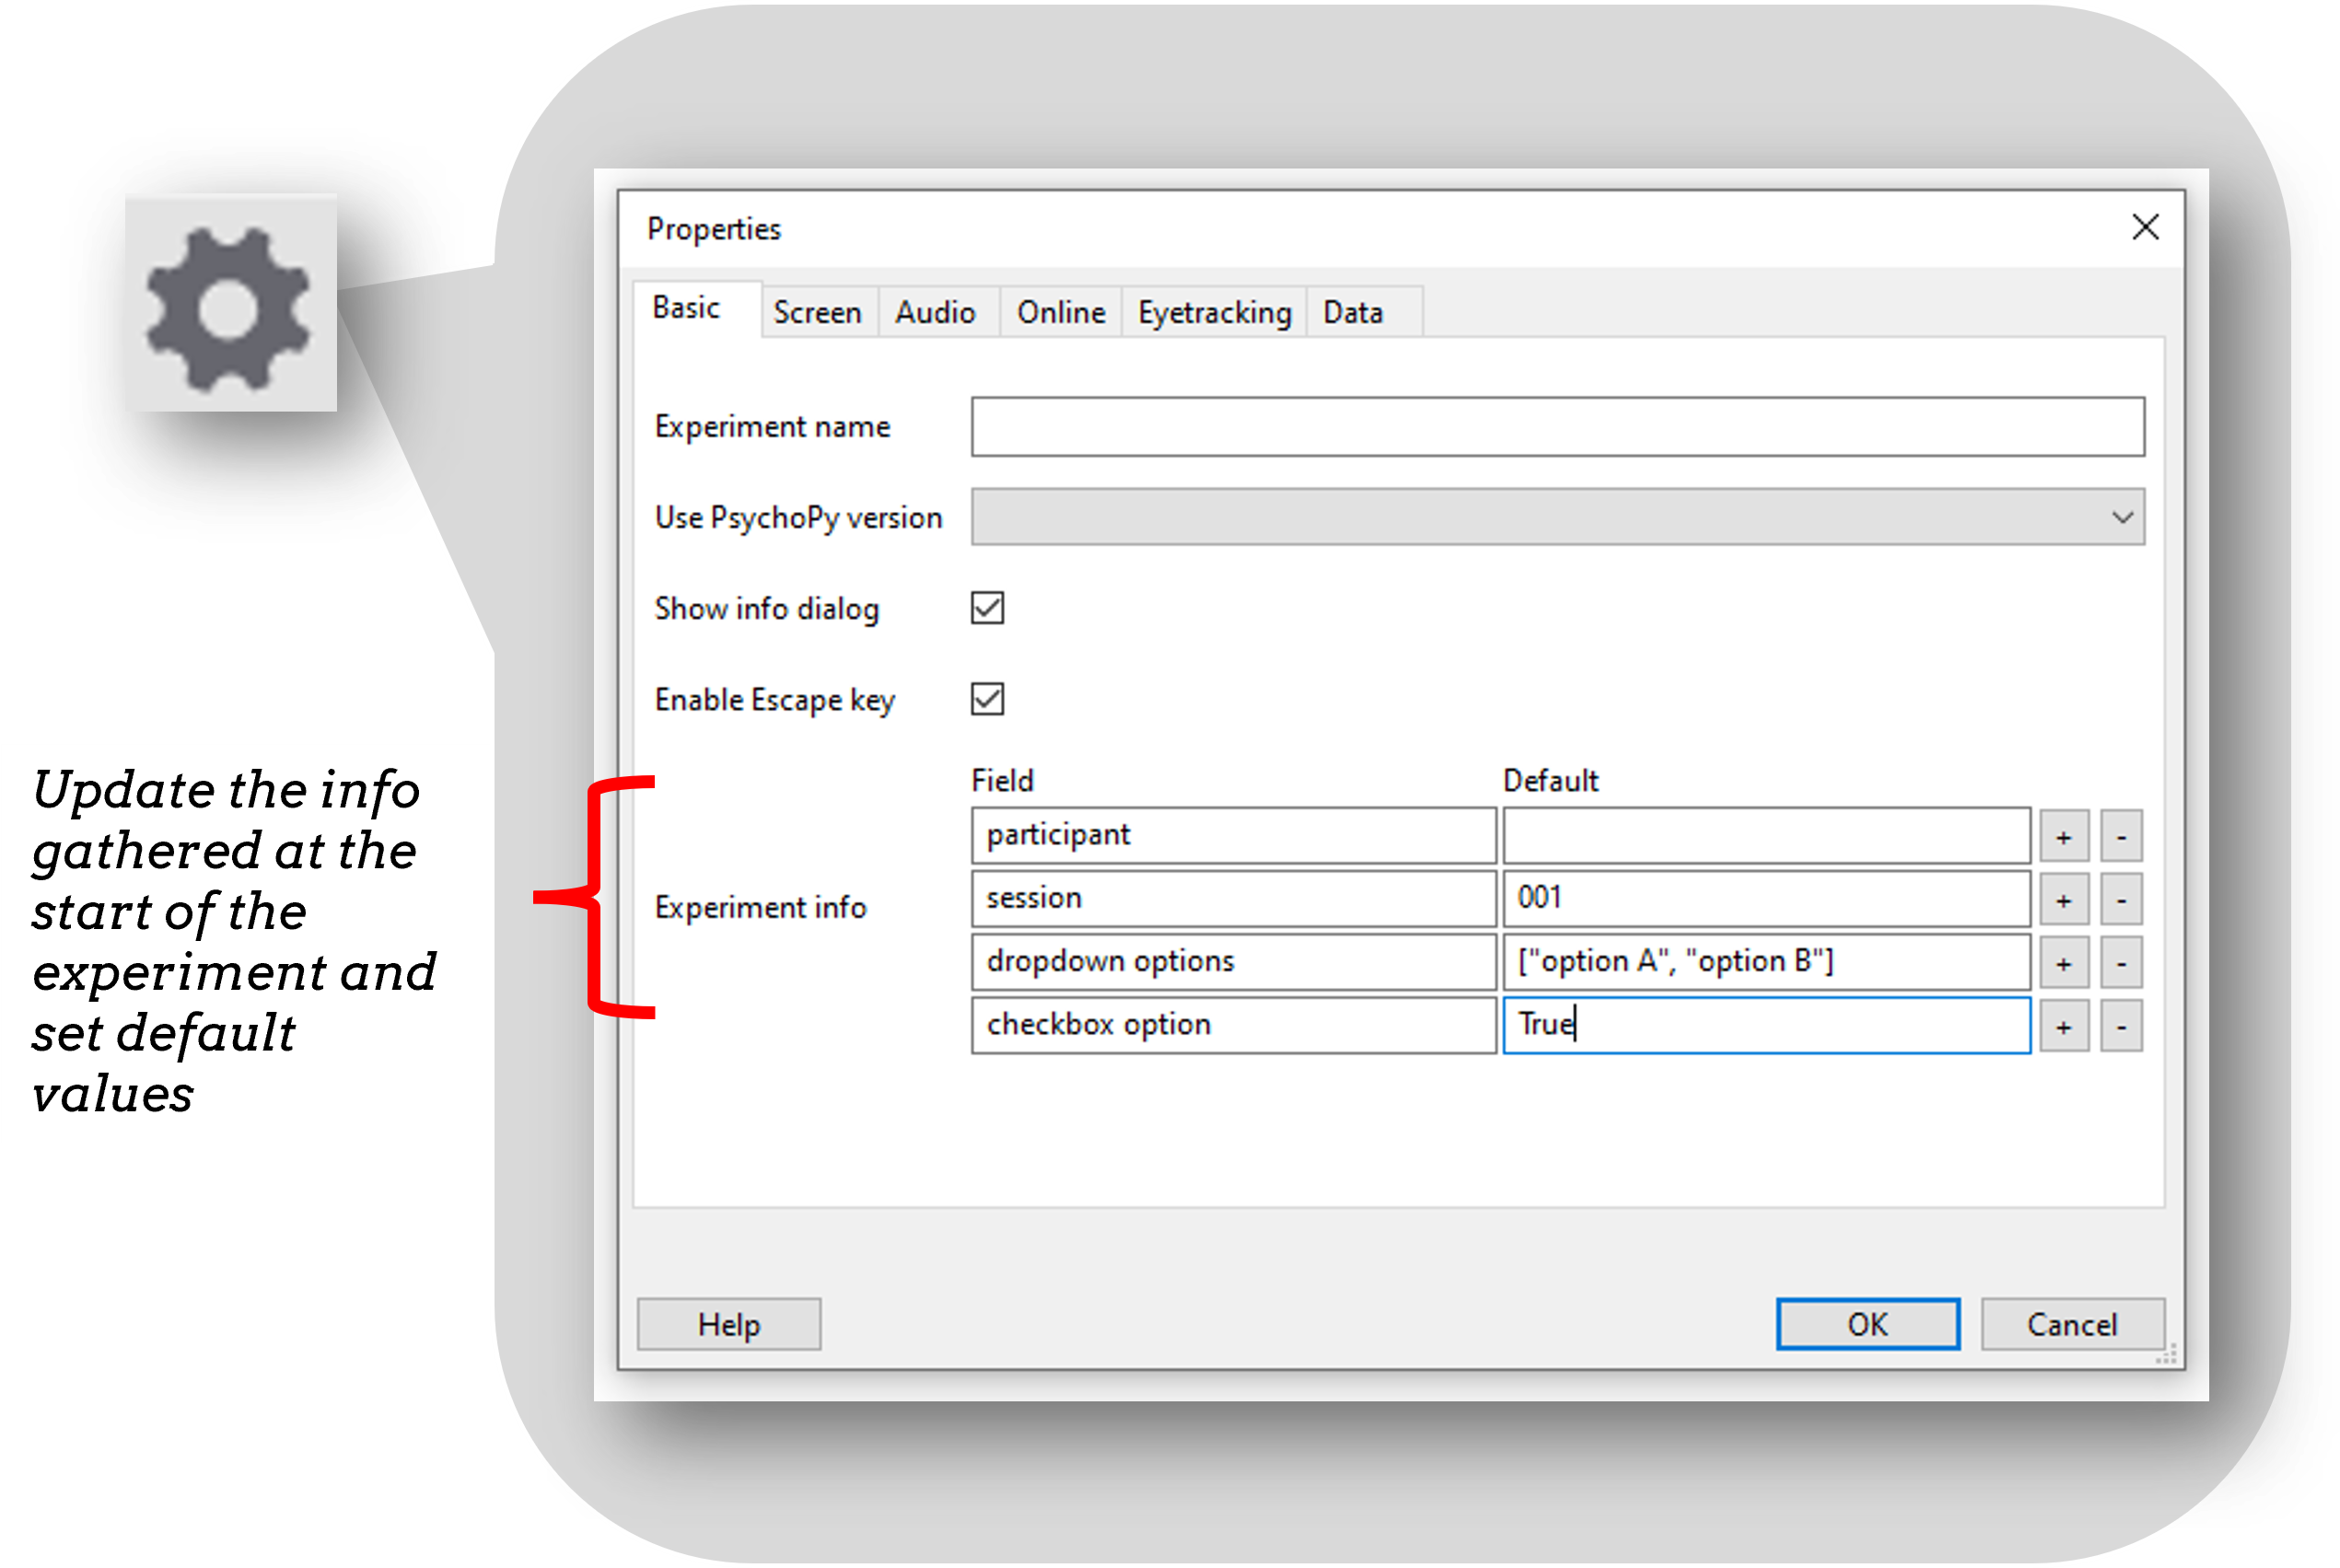
Note
In the current release (2023.2.2) check box options are not yet supported online.
To present several trials, add a loop around the routine to repeat. If something changes trial-by-trial, we make a spreadsheet. Each header is a variable, each row corresponds to the value of that variable on each trial.
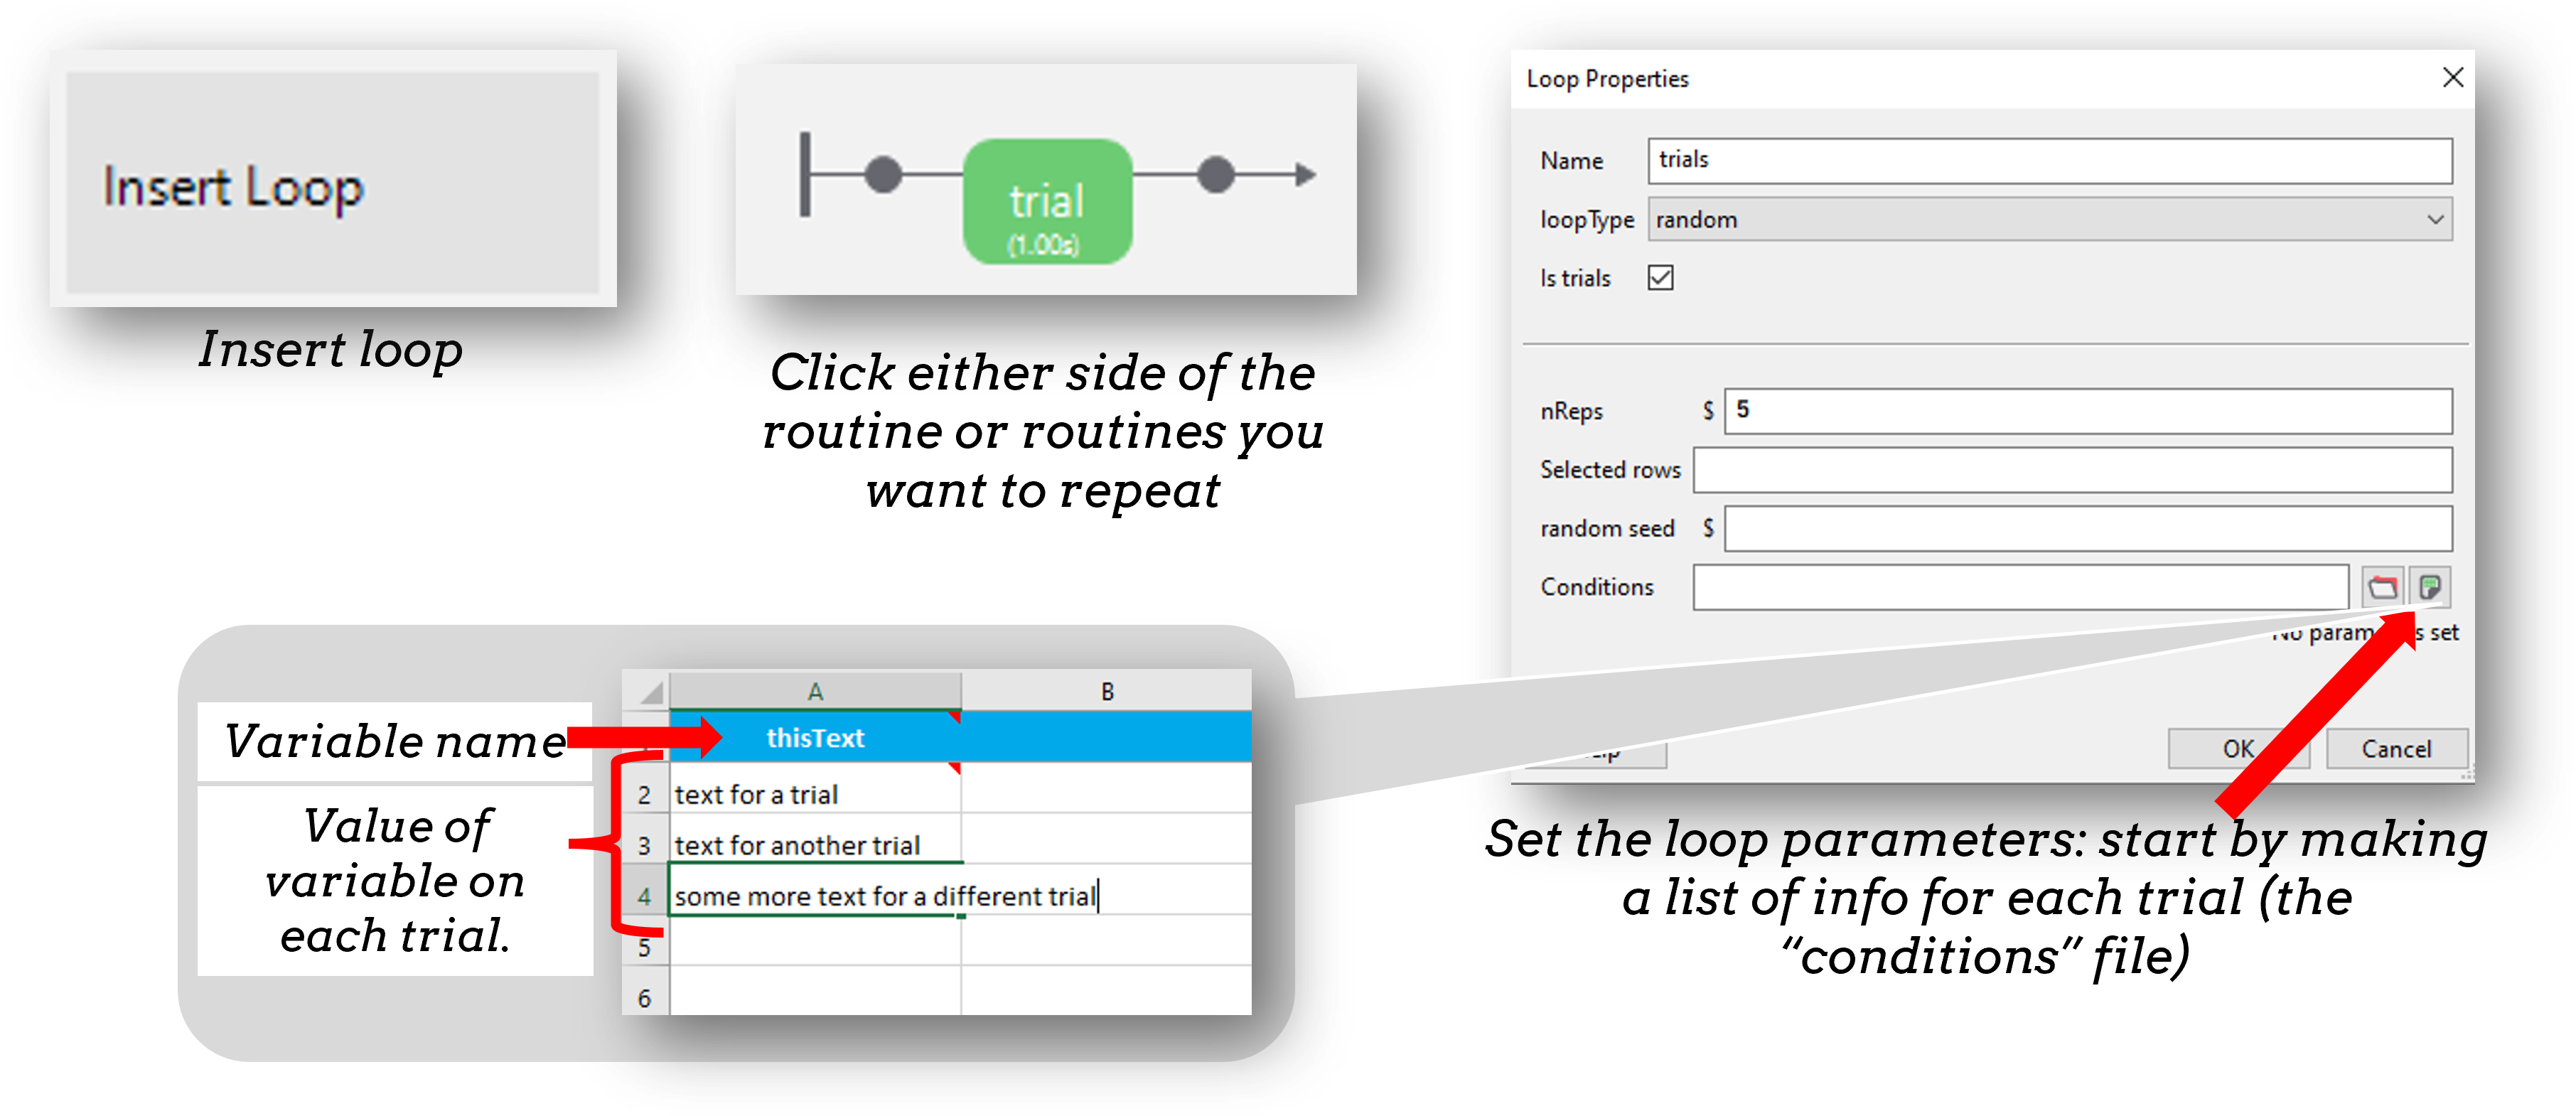
Fig. 2 Once we have inserted a loop we can add a spreadsheet of trials to the “conditions” field.
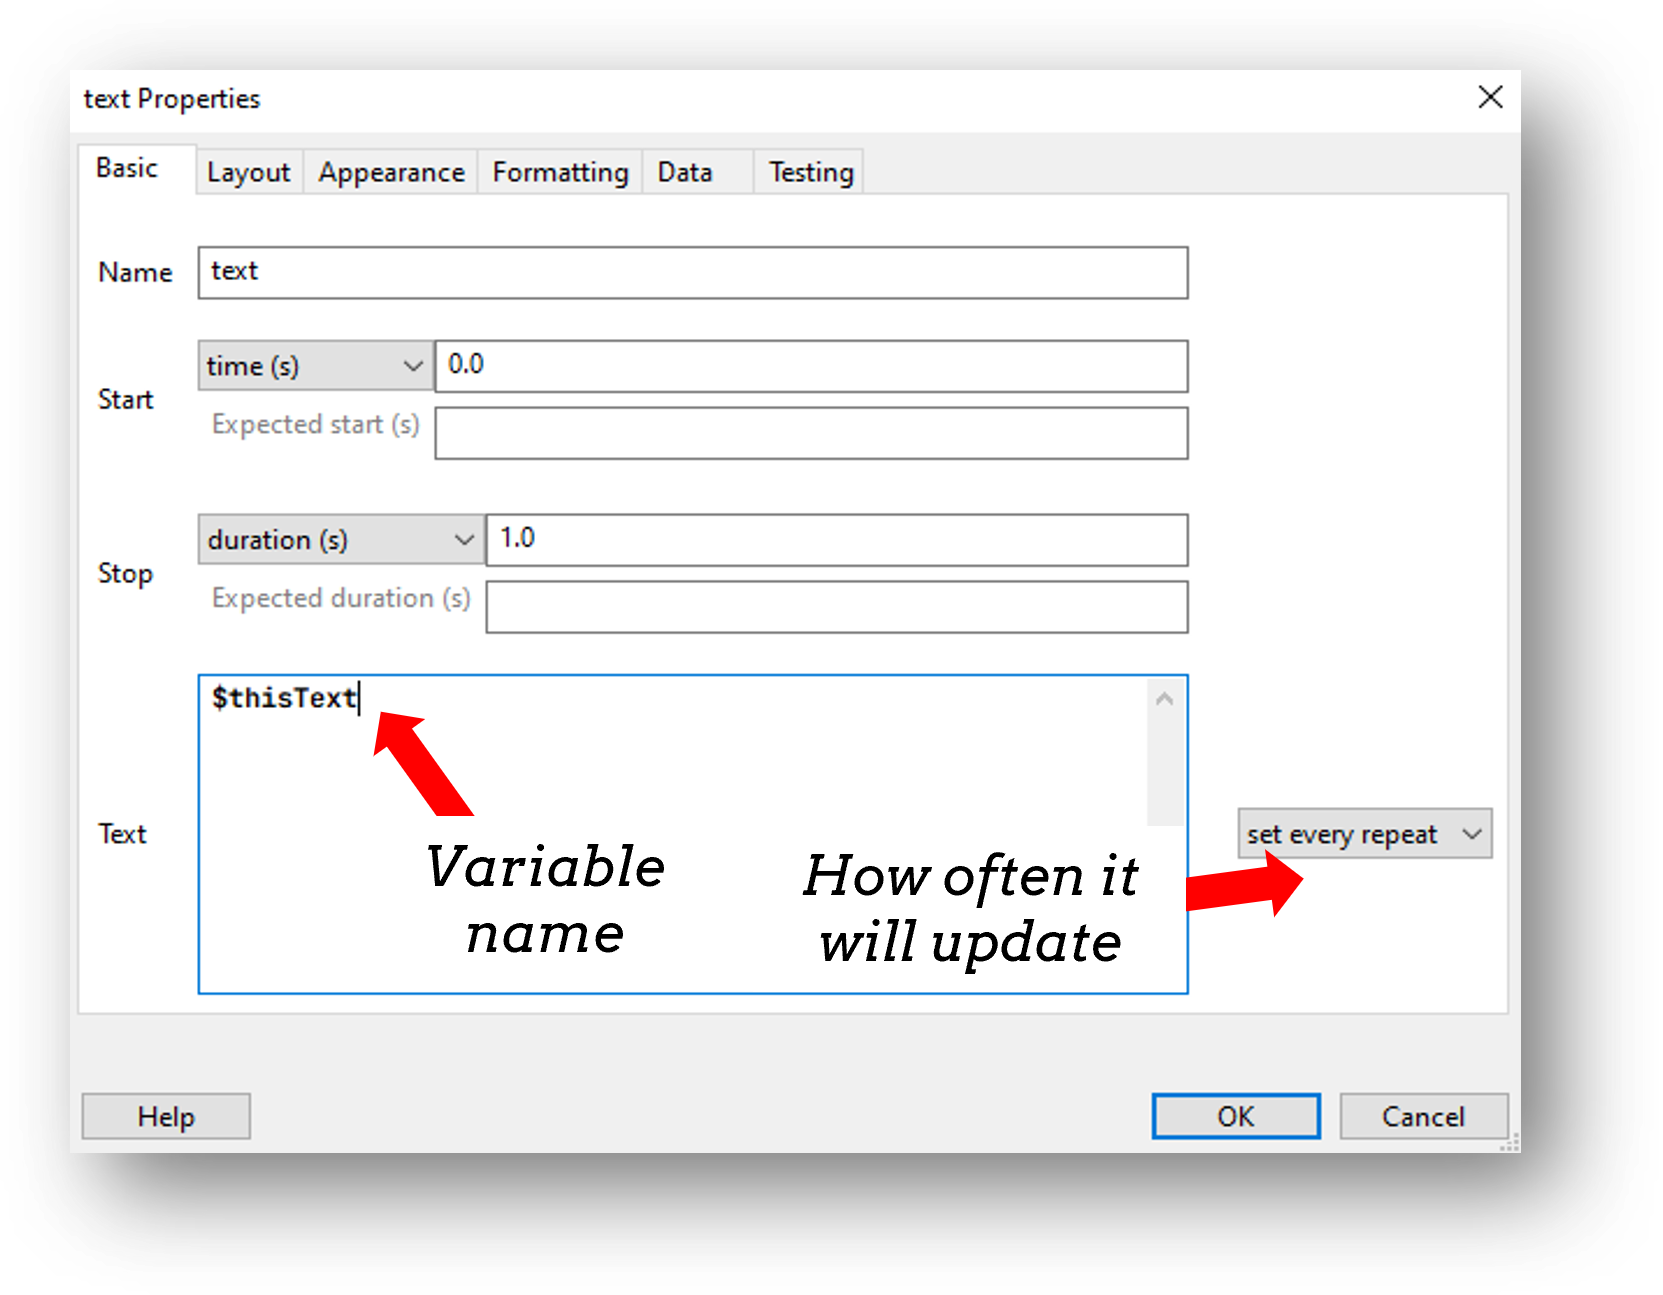
Then make sure to use that variable to set the parameter of a component on every repeat of your loop.
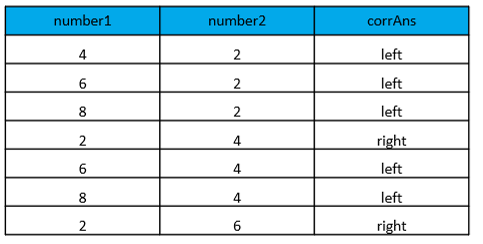
To store accuracy, we need to consider what is the correct key press on each trial. We can therefore add a column to our conditions spreadsheet to indicate what is the correct answer on each trial (in the example below the participant is asked on each trial which number is numerically larger, the correct asnwer is indicated by “corrAns”)
In our keyboard component, we can then select “Store correct” and use the variable $corrAns in the field.
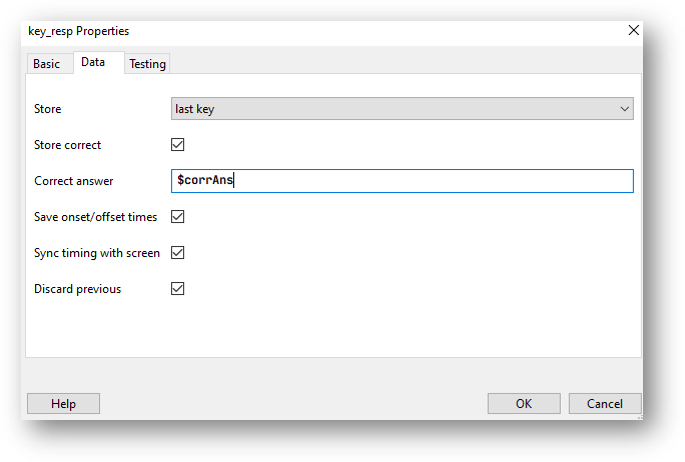
Fig. 3 The data tab of the keyboard component, to store the correct answer click “store correct” if the correct answer changes trial by trial use a variable that is set from the spreadsheet.
A block design is where we have sets of similar trials organized into blocks rather than having trials interleaved.
a block of faces to recognize or a block of houses
a block of Stroop task in English and a block in French
a block of valid trials versus a block of invalid trials
Note: these are all cases where the components would be identical between blocks.
When people have several “blocks” the natural move is to add separate routines for those blocks:

But then, how do we randomise the order of the blocks in the experiment?
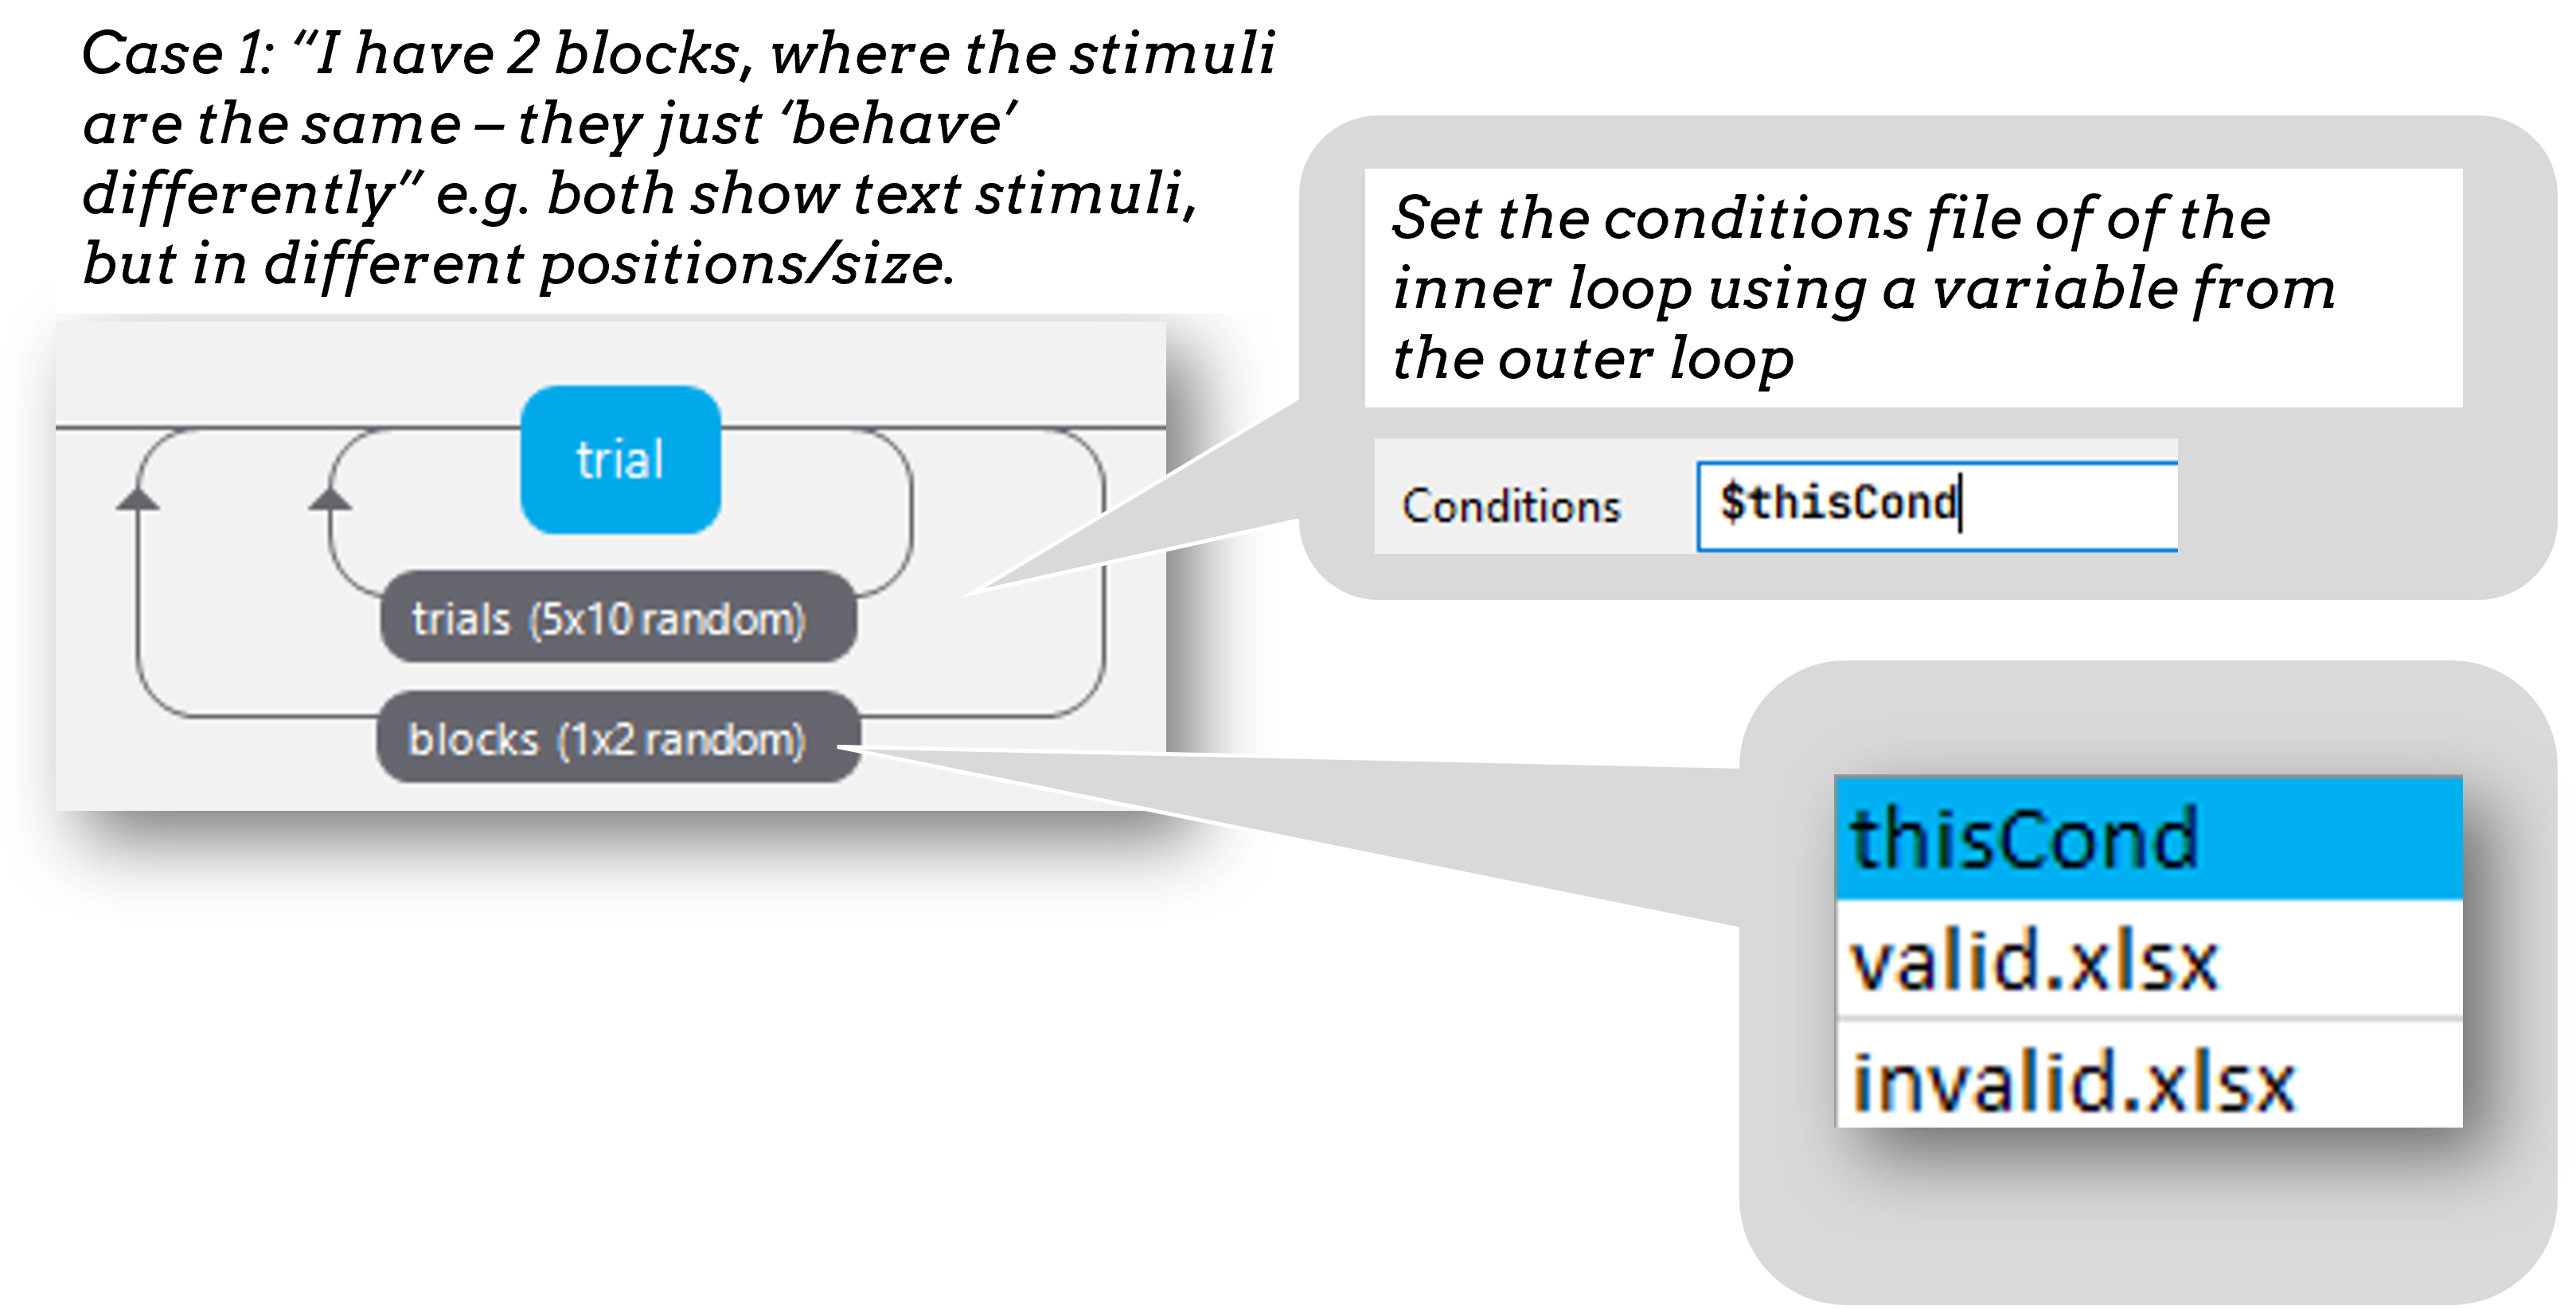
Instead of a Routine for each block, create one Routine and reuse it for different blocks. You can feed in a different spreadsheet per block by nesting your loops!:
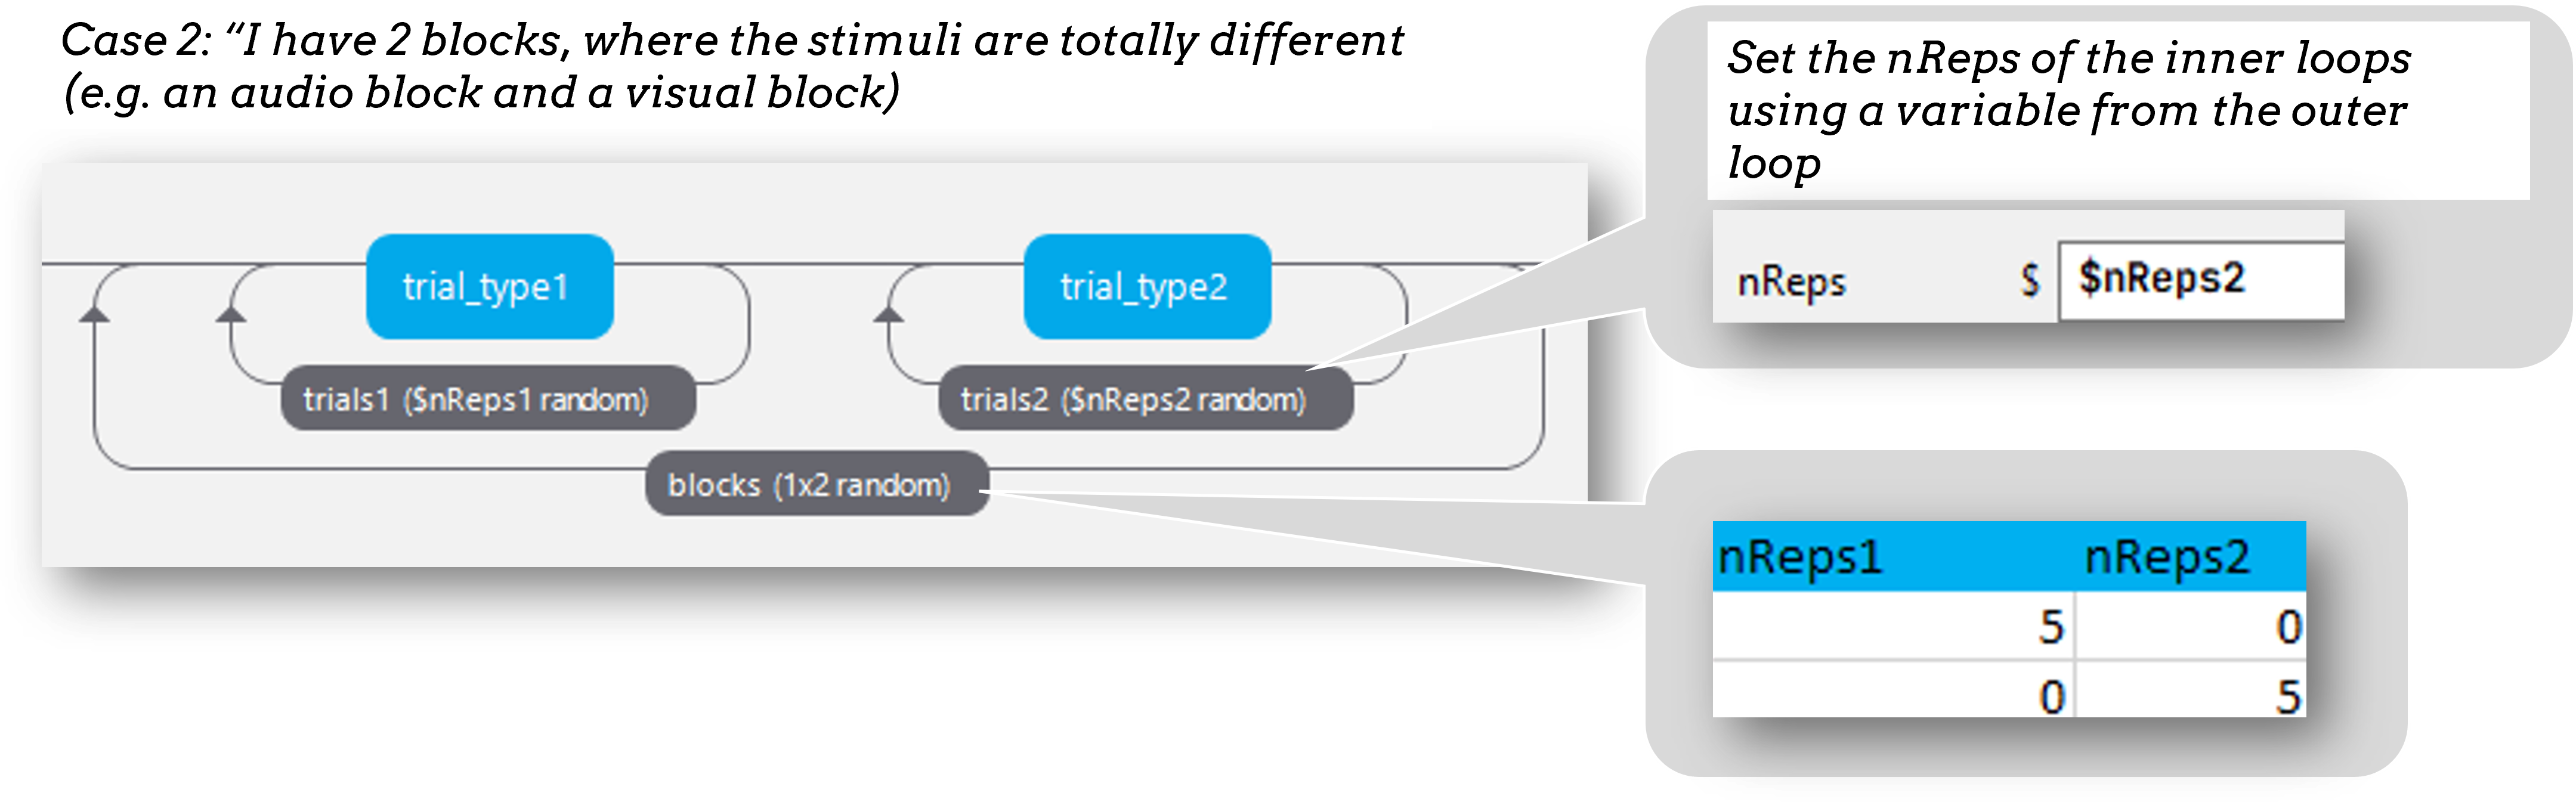
If you do have two blocks that contain very different stimuli/components the approach to take is to control the number of times each block repeats using an outer-loop.
Think of nReps as a way of turning on or off different routines on your flow, if nReps is 0 then that routine will not be presented.
To make blocks appear in a set order, we would set our loop type to “sequential”.
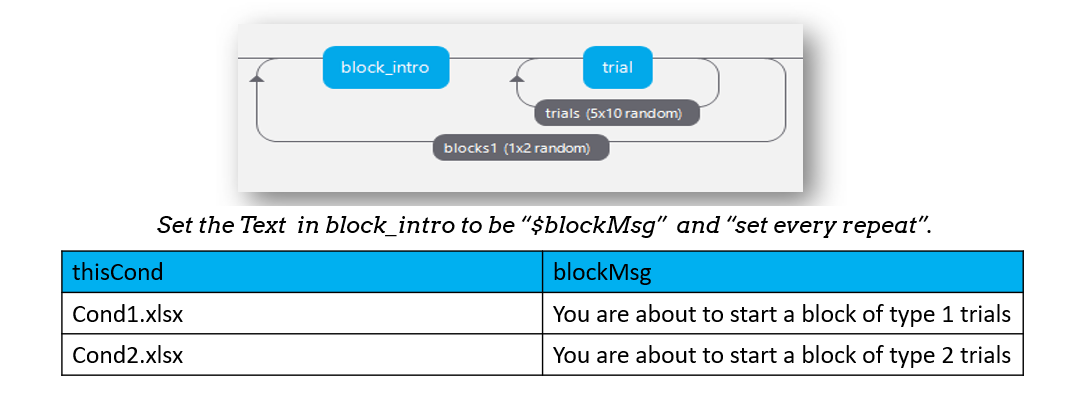
To introduce each block you can add a routine inside the blocks loop, but outside of the trials loop i.e. to introduce each set of trials.
Counterbalancing your blocks involves presenting blocks in a particular order for each group.
A spreadsheet listing the block orders for each group.
An input at the start of the experiment to determine which spreadsheet to use for this participant.
A way for the Loop to use the input from the startup dialogue, to select the right spreadsheet.
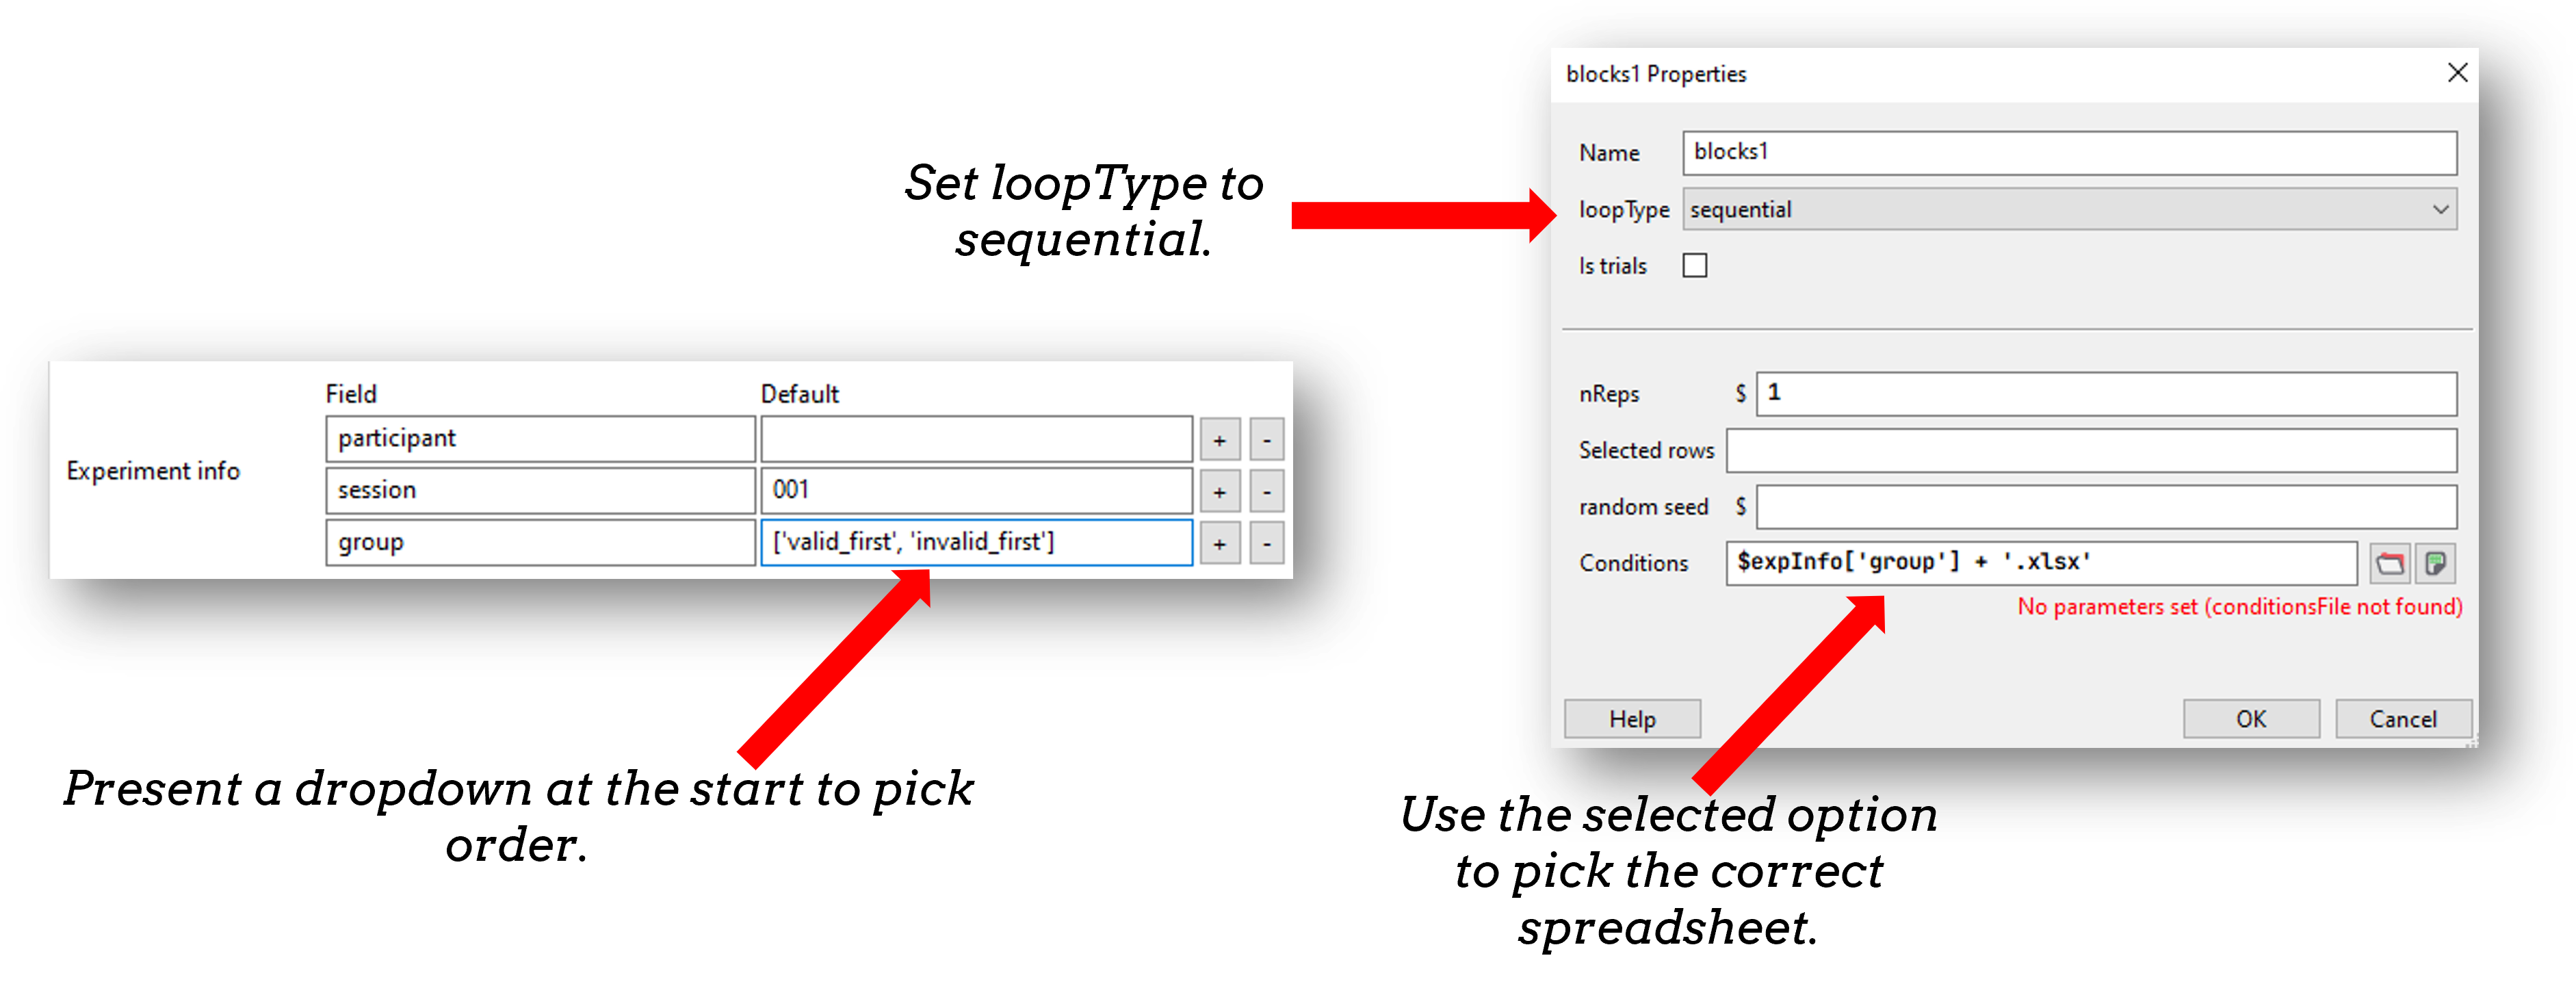
For the “Conditions” field in the block loop we access the “group” field from the start dialogue by refering to “expInfo”
$"block" + expInfo['group'] + ".xlsx"
Note
expInfo is a python “dictionary” that stores all information from the startup GUI. Fields of a python dictionary are accessed using the format dictName['fieldName']. It works the same locally and online and means you can set features of your experiment based on the input received at startup!
You now know the building blocks to making basic and complex blocked designs!